Solid State Drives (SSDs) are slowly becoming the norm, with good reason. They are faster, and the latest iterations are more reliable than traditional drives. With no moving parts to wear out, these drives can (effectively) enjoy a longer life than standard platter-based drives.

Even though these drives are not prone to mechanical failure, you will still want to keep tabs on their health. After all, your data depends on the storing drives being sound and running properly. Many SSDs you purchase are shipped with software that can be used to monitor said health. However, most of that software is, as you might expect, Windows-only. Does that mean Linux users must remain in the dark as to their drive health? No. Thanks to a very handy tool called GNOME Disks, you can get a quick glimpse of your drive health and run standard tests on the drive.
With GNOME Disks, you can:
-
Get a quick glimpse of your drive’s health
-
Run standard tests against your drives
-
Format your drives
-
Create a disk image
-
Restore a disk image
-
Benchmark a disk
-
Power off a disk
All from a handy, user-friendly GUI tool.
Let’s install GNOME Disks and use it to test the health of your installed SSDs.
Installation
GNOME Disk is not limited to distributions running GNOME. In fact, I will demonstrate GNOME Disks from my Elementary OS Freya desktop. The installation is quite simple. If you’re using a non-Ubuntu-based distribution, the installation can be achieved by swapping out the package manager used on your system (i.e. dnf or zypper for apt-get).
The installation of GNOME Disks can be done from a single command. Here’s how:
-
Open up a terminal window
-
Issue the command sudo apt-get install gnome-disk-utility
-
Type your sudo password and hit the Enter key
-
Type y when prompted
-
Allow the installation to complete
That’s it. GNOME Disks should now be installed. Go through your desktop menu, locate the app, and click to launch.
Using GNOME Disks
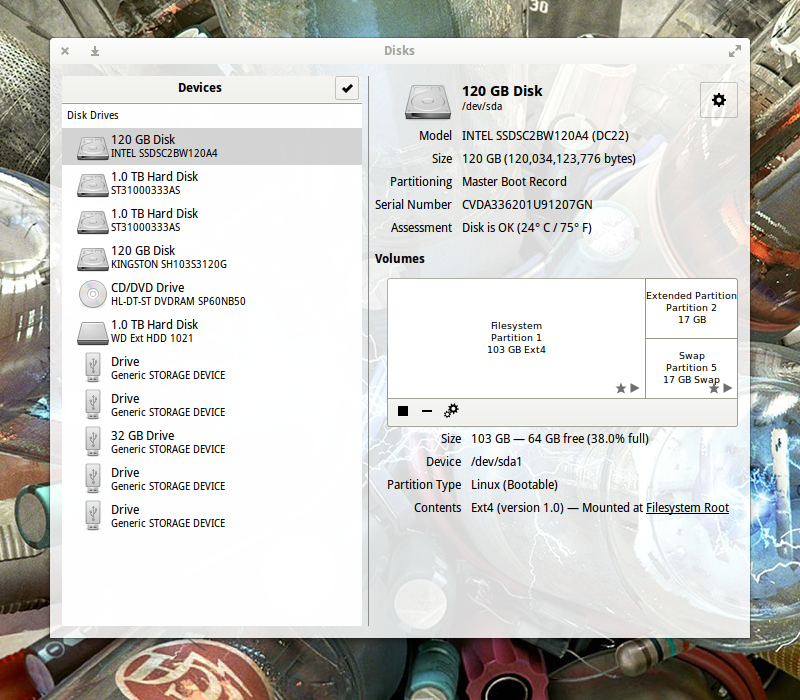
The GNOME Disks main window is laid out quite well (Figure 1 above).
From here you should see all of your attached drives. The SSDs will not be labeled any differently than the standard drives (unless the manufacturer included SSD in the name (as you see with the INTEL 120 GB SSD on my system—labeled SSDSC2BW120A4). Otherwise, it’ll be up to you to know which drives are SSDs and which are Standard.

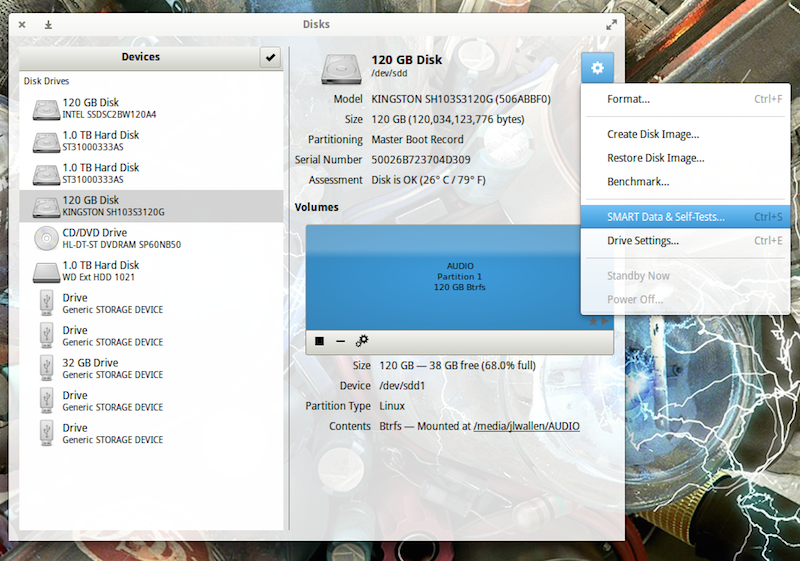
Let’s run a test. To do so, open up GNOME Disks and select the disk you want to test. You should automatically see a quick Assessment of the drive (size, partitioning, Serial number, health, and temp). Click on the gear icon and then, from the drop-down, select SMART Data & Self-Tests… (Figure 2).
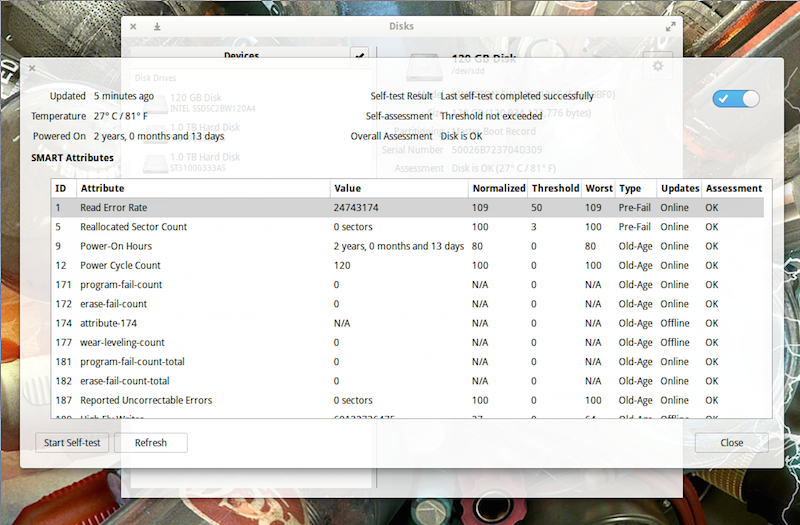
In the new window, you should see the results of the last test run (Figure 3). You should also see that the SMART (Self-Monitoring, Analysis and Reporting Technology) option is enabled (slider in the top right of the window). If SMART isn’t enabled, click the slider to enable.
To run a new test, click the Start Self-test button.

When you click the Start Self-test button, a drop-down menu will appear, from which you can choose one of three tests:
-
Short—A collection of test routines that have the highest chance of detecting drive problems.
-
Extended—Tests complete disk surface and performs various test routines built into the drive.
-
Conveyance—Identify damage incurred during transporting of drive.
You will be required to enter your sudo password to continue on with the test. Once authenticated, the testing will begin. As the test runs, a progress meter will report the percentage of the test complete (as well as the Start button will change to Stop).
After the Self-Test completes, the new results will populate the window. One thing you will notice is that each SSD will return different test entries. Not all manufacturers follow the same standard. For example, I have two different SSDs installed in my System76 Leopard Extreme. The first (an Intel SSD) was installed by System76. The second, a Kingston SSD, was installed by me. If I run the SMART test on both, I see different tests appear in the results. For example, the Kingston drive doesn’t have Media_Wearout_Indicator enabled (whereas the Intel drive does). I confirmed this by using the smartmontools command:
sudo smartctl -a /dev/sda | grep Media_Wearout_Indicator
The above command reported (for the Intel drive):
233 Media_Wearout_Indicator 0x0032 092 092 000 Old_age Always - 0
For the Kingston, the same command returned nothing.
If the smartctl command is missing, you can install smartmontools with the command:
sudo apt-get install smartmontools
You can get a full listing of your drive health with the command:
sudo smartctl -a /dev/sdX
where X is the name of the drive.
However, one of the most important lines you’ll want to look for in the results, is Power-On Hours. This will tell you how many hours your drive has actually been in use. According to GNOME Disks, my Power-On Hours for both disks is shown in Figure 4.

According to smartctl, that breaks down to:
-
Kingston—17868h+55m+21.280s
-
Intel—13833 (194 68 0)
Both of those figures are accurate.
How Many Power-On Hours Should You Expect?
How many Power-On Hours you will get depends on the make and model of your drive. Most modern SSDs should easily last 3-5 years under a heavy server load. Your best bet, however, is to check with your manufacturer. Just five short years ago, SSD manufacturers were reporting lifespans of around 10,000 Power-On Hours.
Clearly, my two drives have already exceeded that. Of course, getting a true estimate is much more complicated than this (you should factor in write-cycles, temperature, etc.) However, modern SSDs are capable of actually outliving the machine’s housing them. If you’re paranoid about data loss (and you should be), it’s good to know that getting a quick glance into the health of your SSDs is nothing more than a user-friendly GUI away.
GNOME Disks happens to be one of the best means of assessing drive health in Linux with a GUI. Give this tool a try and keep tabs on your drive health with ease.


