There are so many reasons why you might need to record your Linux desktop. The two most important are for training and for support. If you are training users, a video recording of the desktop can go a long way to help them understand what you are trying to impart. Conversely, if you’re having trouble with one aspect of your Linux desktop, recording a video of the shenanigans could mean the difference between solving the problem and not. But what tools are available for the task? Fortunately, for every Linux user (regardless of desktop), there are options available. I want to highlight five of my favorite screen recorders for the Linux desktop. Among these five, you are certain to find one that perfectly meets your needs. I will only be focusing on those screen recorders that save as video. What video format you prefer may or may not dictate which tool you select.
And, without further ado, let’s get on with the list.
Simple Screen Recorder
I’m starting out with my go-to screen recorder. I use Simple Screen Recorder on a daily basis, and it never lets me down. This particular take on the screen recorder is available for nearly every flavor of Linux and is, as the name implies, very simple to use. With Simple Screen Recorder you can select a single window, a portion of the screen, or the entire screen to record. One of the best features of Simple Screen Recorder is the ability to save profiles (Figure 1), which allows you to configure the input for a recording (including scaling, frame rate, width, height, left edge and top edge spacing, and more). By saving profiles, you can easily use a specific profile to meet a unique need, without having to go through the customization every time. This is handy for those who do a lot of screen recording, with different input variables for specific jobs.
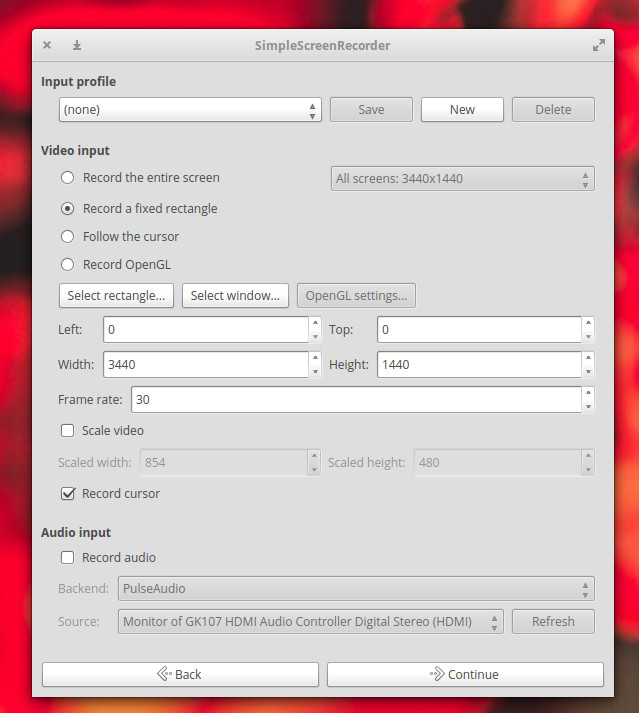
Simple screen recorder also:
-
Records audio input
-
Allows you to pause and resume recording
-
Offers a preview during recording
-
Allows for the selection of video containers and codecs
-
Adds timestamp to file name (optional)
-
Includes hotkey recording and sound notifications
-
Works well on slower machines
-
And much more
Simple Screen Recorder is one of the most reliable screen recording tools I have found for the Linux desktop. Simple Screen Recorder can be installed from the standard repositories on many desktops, or via easy to follow instructions on the application download page.
Gtk-recordmydesktop
The next entry, gtk-recordmydesktop, doesn’t give you nearly the options found in Simple Screen Recorder, but it does offer a command line component (for those who prefer not working with a GUI). The simplicity that comes along with this tool also means you are limited to a specific video output format (.ogv). That doesn’t mean gtk-recordmydesktop isn’t without appeal. In fact, there are a few features that make this option in the genre fairly appealing. First and foremost, it’s very simple to use. Second, the record window automatically gets out of your way while you record (as opposed to Simple Screen Recorder, where you need to minimize the recording window when recording full screen). Another feature found in gtk-recordmydesktop is the ability to have the recording follow the mouse (Figure 2).
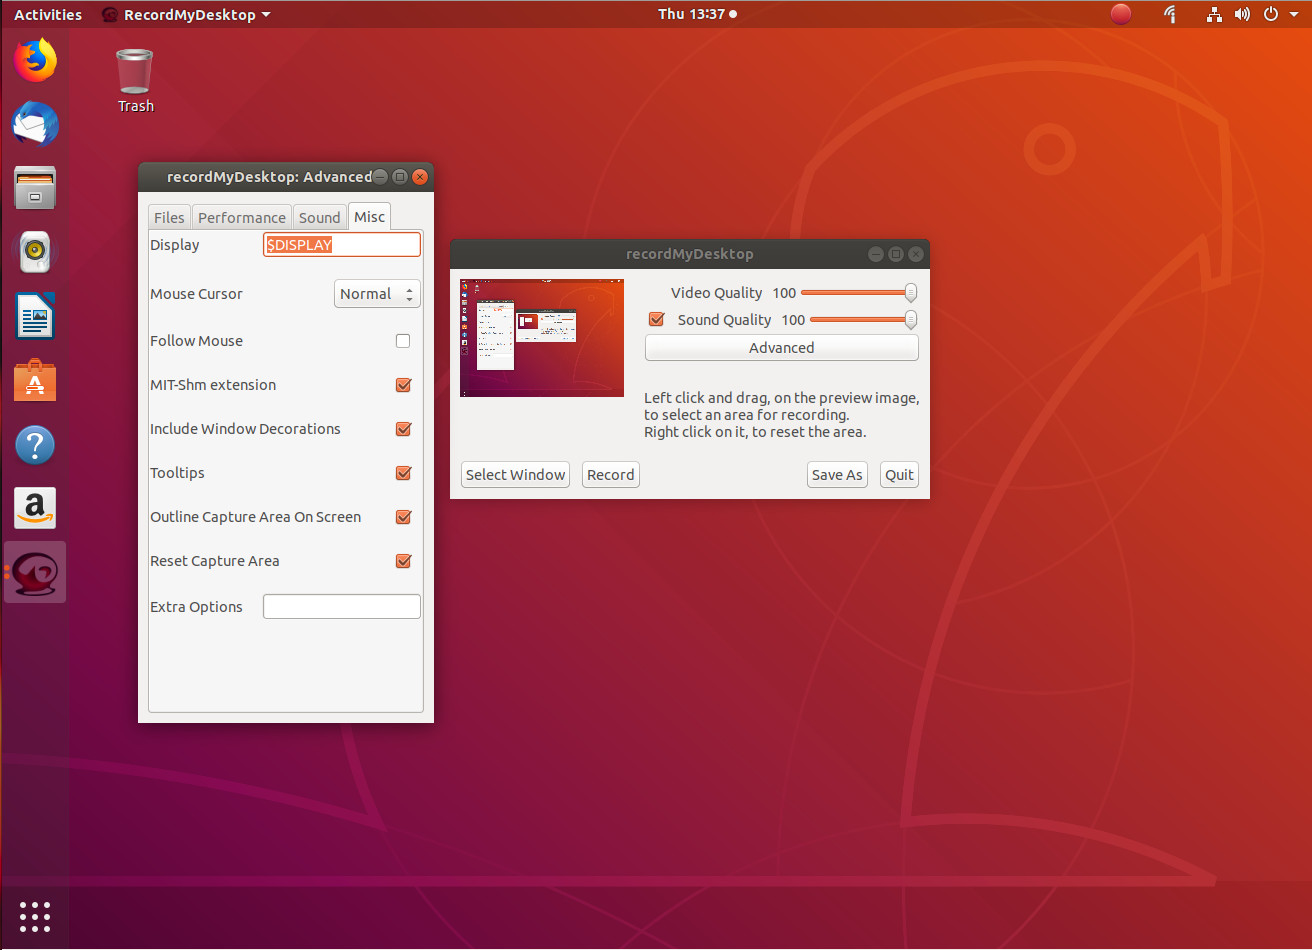
Unfortunately, the follow the mouse feature doesn’t always work as expected, so chances are you’ll be using the tool without this interesting option. In fact, if you opt to go the gtk-recordmydesktop route, you should understand the GUI frontend isn’t nearly as reliable as is the command line version of the tool. From the command line, you could record a specific position of the screen like so:
recordmydesktop -x X_POS -y Y_POS --width WIDTH --height HEIGHT -o FILENAME.ogv
where:
-
X_POS is the offset on the X axis
-
Y_POS is the offset on the Y axis
-
WIDTH is the width of the screen to be recorded
-
HEIGHT is the height of the screen to be recorded
-
FILENAME is the name of the file to be saved
To find out more about the command line options, issue the command man recordmydesktop and read through the manual page.
Kazam
If you’re looking for a bit more than just a recorded screencast, you might want to give Kazam a go. Not only can you record a standard screen video (with the usual—albeit limited amount of—bells and whistles), you can also take screenshots and even broadcast video to YouTube Live (Figure 3).
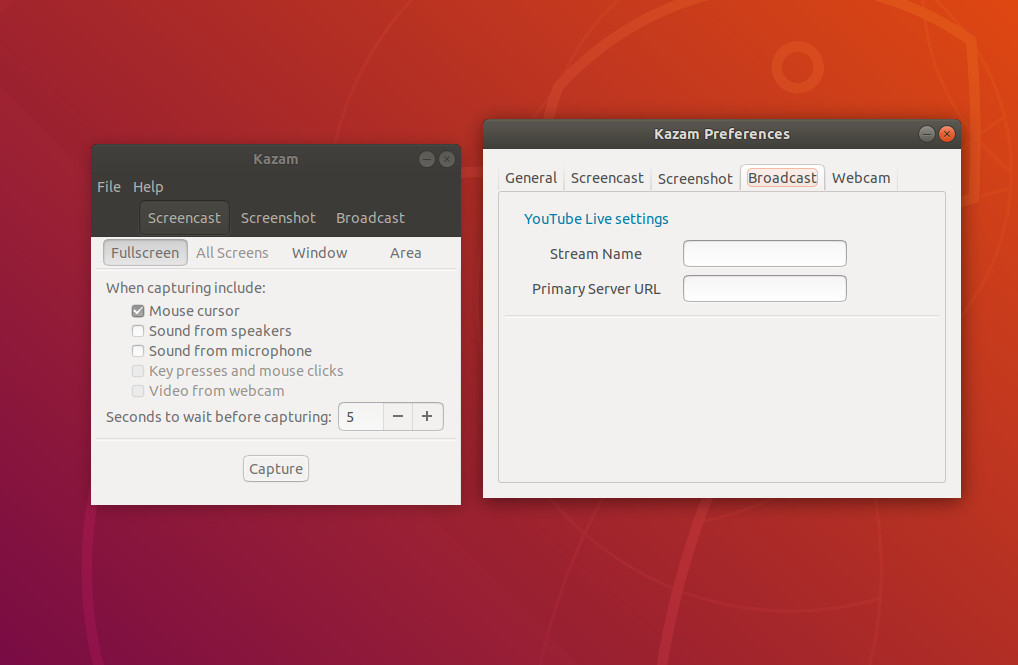
Kazam falls in line with gtk-recordmydesktop, when it comes to features. In other words, it’s slightly limited in what it can do. However, that doesn’t mean you shouldn’t give Kazam a go. In fact, Kazam might be one of the best screen recorders out there for new Linux users, as this app is pretty much point and click all the way. But if you’re looking for serious bells and whistles, look away.
The version of Kazam, with broadcast goodness, can be found in the following repository:
ppa:sylvain-pineau/kazam
For Ubuntu (and Ubuntu-based distributions), install with the following commands:
sudo apt-add-repository ppa:sylvain-pineau/kazam

sudo apt-get update

sudo apt-get install kazam -y
Vokoscreen
The Vokoscreen recording app is for new-ish users who need more options. Not only can you configure the output format and the video/audio codecs, you can also configure it to work with a webcam (Figure 4).
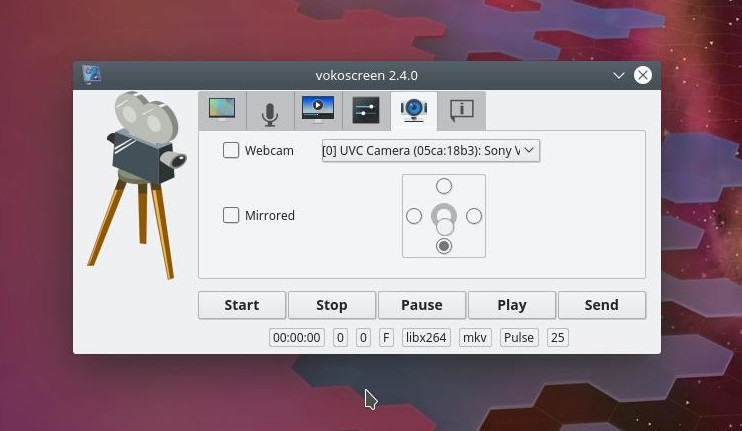
As with most every screen recording tool, Vokoscreen allows you to specify what on your screen to record. You can record the full screen (even selecting which display on multi-display setups), window, or area. Vokoscreen also allows you to select a magnification level (200×200, 400×200, or 600×200). The magnification level makes for a great tool to highlight a specific section of the screen (the magnification window follows your mouse).
Like all the other tools, Vokoscreen can be installed from the standard repositories or cloned from its GitHub repository.
OBS Studio
For many, OBS Studio will be considered the mack daddy of all screen recording tools. Why? Because OBS Studio is as much a broadcasting tool as it is a desktop recording tool. With OBS Studio, you can broadcast to YouTube, Smashcast, Mixer.com, DailyMotion, Facebook Live, Restream.io, LiveEdu.tv, Twitter, and more. In fact, OBS Studio should seriously be considered the de facto standard for live broadcasting the Linux desktop.
Upon installation (the software is only officially supported for Ubuntu Linux 14.04 and newer), you will be asked to walk through an auto-configuration wizard, where you setup your streaming service (Figure 5). This is, of course, optional; however, if you’re using OBS Studio, chances are this is exactly why, so you won’t want to skip out on configuring your default stream.
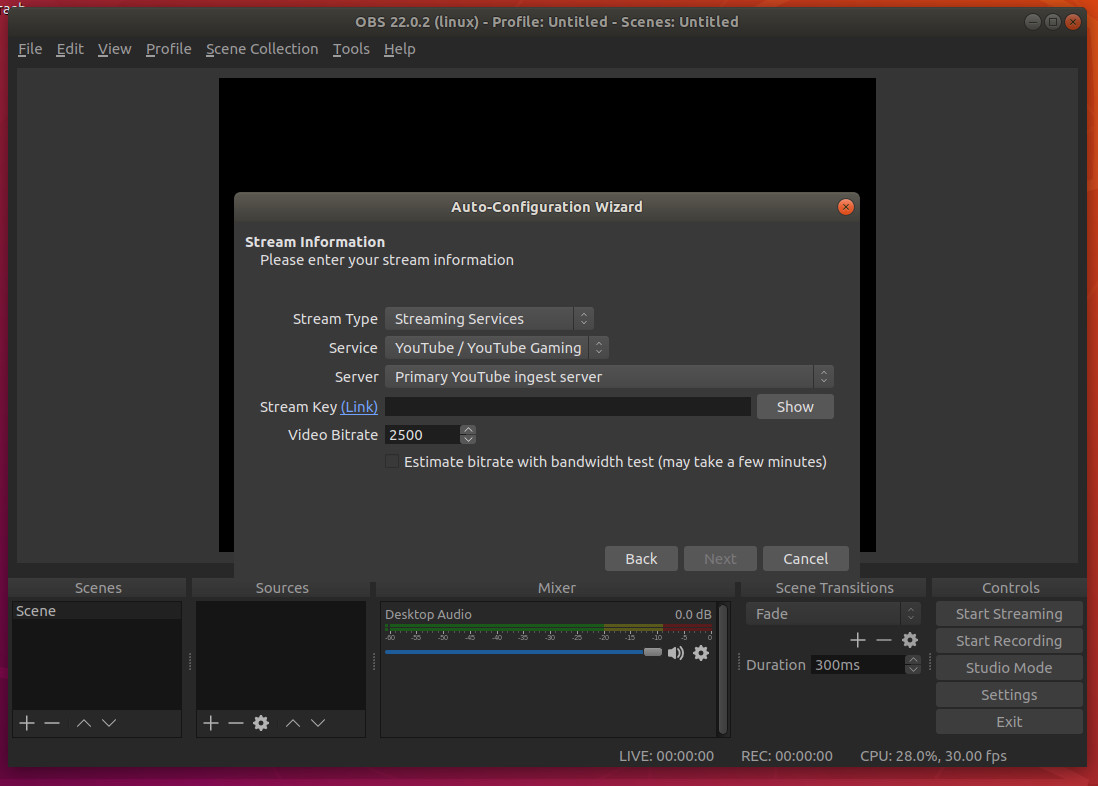
I will warn you: OBS Studio isn’t exactly for the faint of heart. Plan on spending a good amount of time getting the streaming service up and running and getting up to speed with the tool. But for anyone needing such a solution for the Linux desktop, OBS Studio is what you want. Oh … it can also record your desktop screencast and save it locally.
There’s More Where That Came From
This is a short list of screen recording solutions for Linux. Although there are plenty more where this came from, you should be able to fill all your desktop recording needs with one of these five apps.
Learn more about Linux through the free “Introduction to Linux” course from The Linux Foundation and edX.


