Learn how to transition to Linux in this tutorial series from our archives.
In this series, we provide an overview of fundamentals to help you successfully make the transition to Linux from another operating system. If you missed the earlier articles in the series, you can find them here:
Part 2 – Disks, Files, and Filesystems
Part 3 – Graphical Environments
Linux gives you a lot of control over network and system settings. On your desktop, Linux lets you tweak just about anything on the system. Most of these settings are exposed in plain text files under the /etc directory. Here I describe some of the most common settings you’ll use on your desktop Linux system.
A lot of settings can be found in the Settings program, and the available options will vary by Linux distribution. Usually, you can change the background, tweak sound volume, connect to printers, set up displays, and more. While I won’t talk about all of the settings here, you can certainly explore what’s in there.
Connect to the Internet
Connecting to the Internet in Linux is often fairly straightforward. If you are wired through an Ethernet cable, Linux will usually get an IP address and connect automatically when the cable is plugged in or at startup if the cable is already connected.
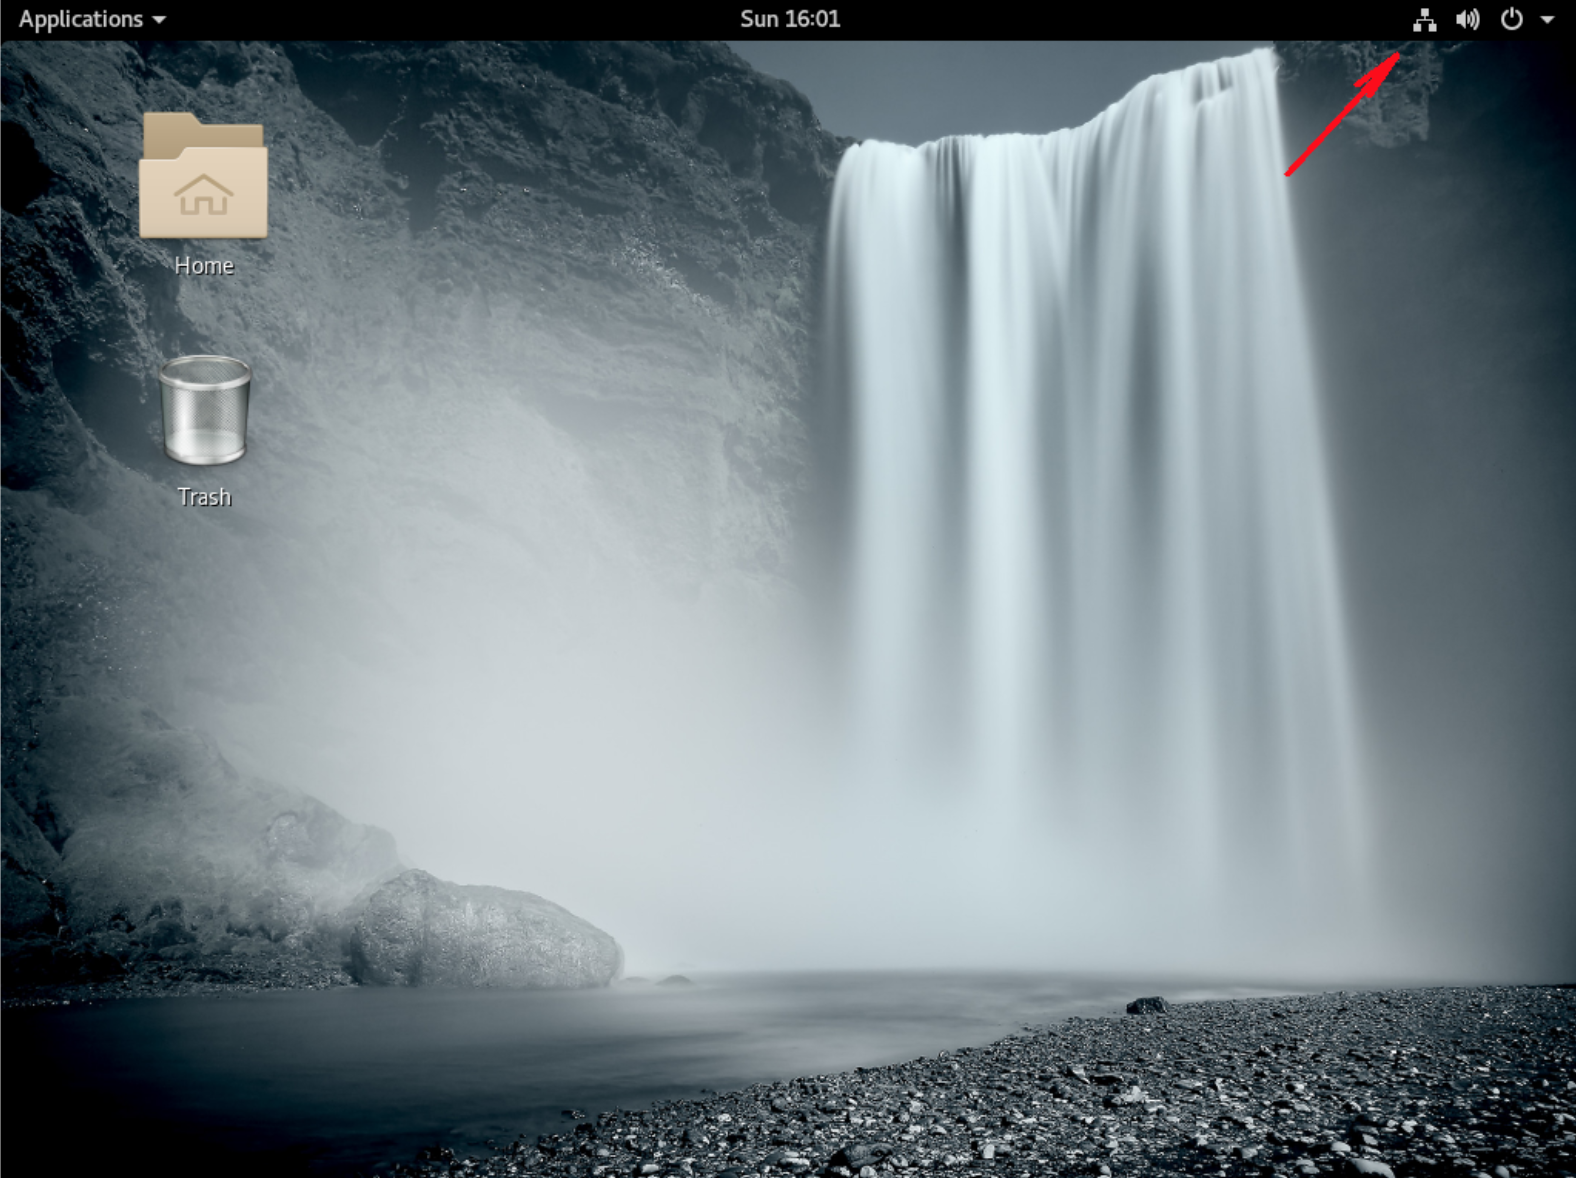
If you are using wireless, in most distributions there is a menu, either in the indicator panel or in settings (depending on your distribution), where you can select the SSID for your wireless network. If the network is password protected, it will usually prompt you for the password. Afterward, it connects, and the process is fairly smooth.
You can adjust network settings in the graphical environment by going into settings. Sometimes this is called System Settings or just Settings. Often you can easily spot the settings program because its icon is a gear or a picture of tools (Figure 1).
Network Interface Names
Under Linux, network devices have names. Historically, these are given names like eth0 and wlan0 — or Ethernet and wireless, respectively. Newer Linux systems have been using different names that appear more esoteric, like enp4s0 and wlp5s0. If the name starts with en, it’s a wired Ethernet interface. If it starts with wl, it’s a wireless interface. The rest of the letters and numbers reflect how the device is connected to hardware.
Network Management from the Command Line
If you want more control over your network settings, or if you are managing network connections without a graphical desktop, you can also manage the network from the command line.
Note that the most common service used to manage networks in a graphical desktop is the Network Manager, and Network Manager will often override setting changes made on the command line. If you are using the Network Manager, it’s best to change your settings in its interface so it doesn’t undo the changes you make from the command line or someplace else.
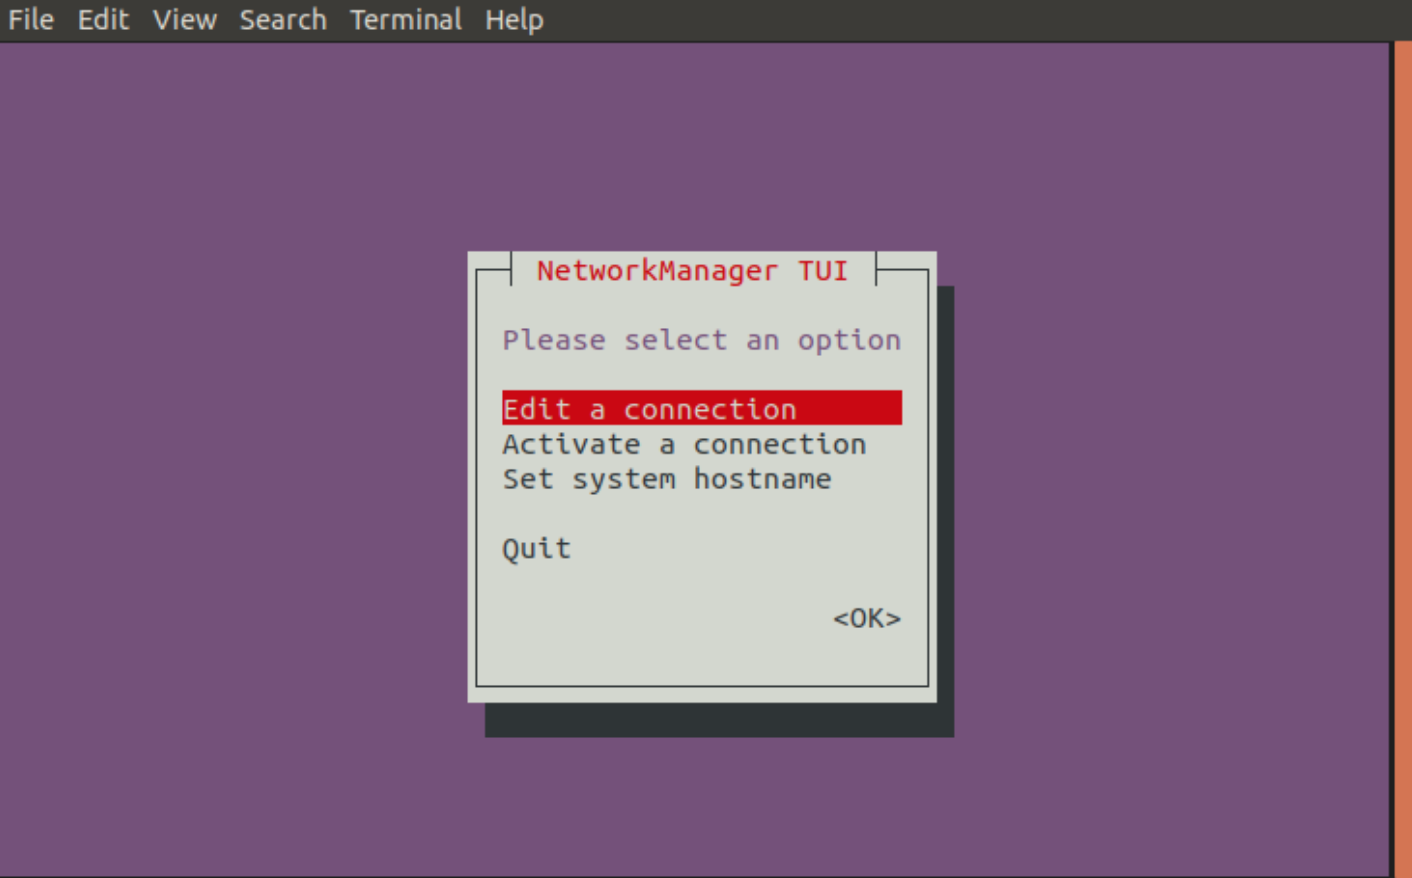
Changing settings in the graphical environment is very likely to be interacting with the Network Manager, and you can also change Network Manager settings from the command line using the tool called nmtui. The nmtui tool provides all the settings that you find in the graphical environment but gives it in a text-based semi-graphical interface that works on the command line (Figure 2).
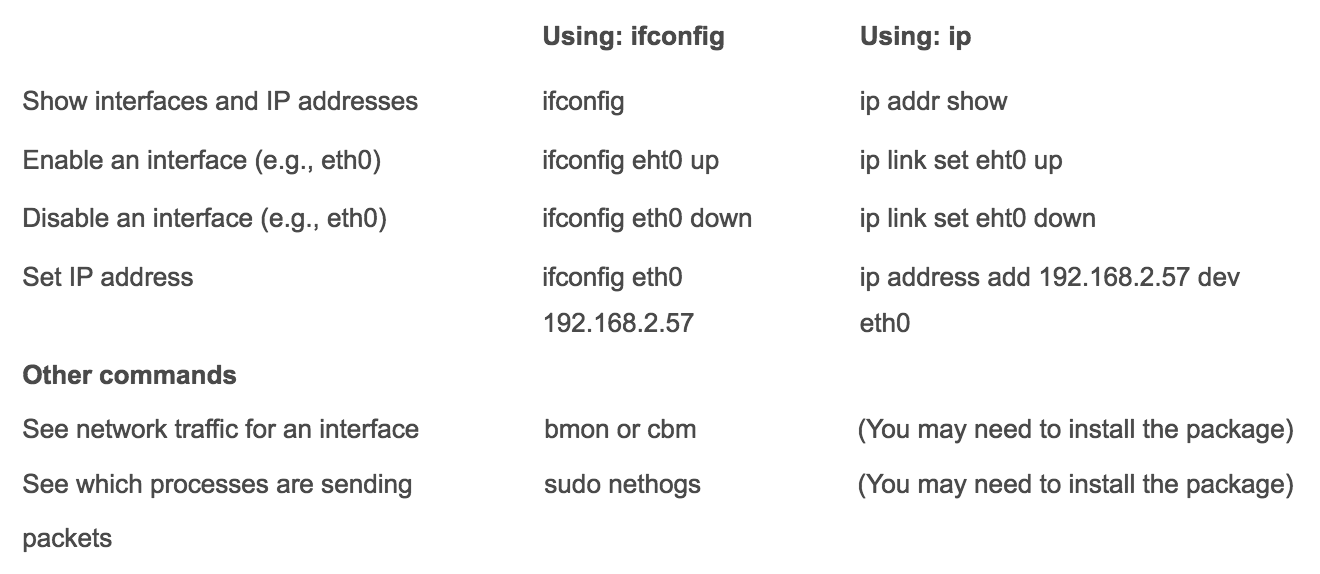
On the command line, there is an older tool called ifconfig to manage networks and a newer one called ip. On some distributions, ifconfig is considered to be deprecated and is not even installed by default. On other distributions, ifconfig is still in use.
Here are some commands that will allow you to display and change network settings:
Process and System Information
In Windows, you can go into the Task Manager to see a list of the all the programs and services that are running. You can also stop programs from running. And you can view system performance in some of the tabs displayed there.
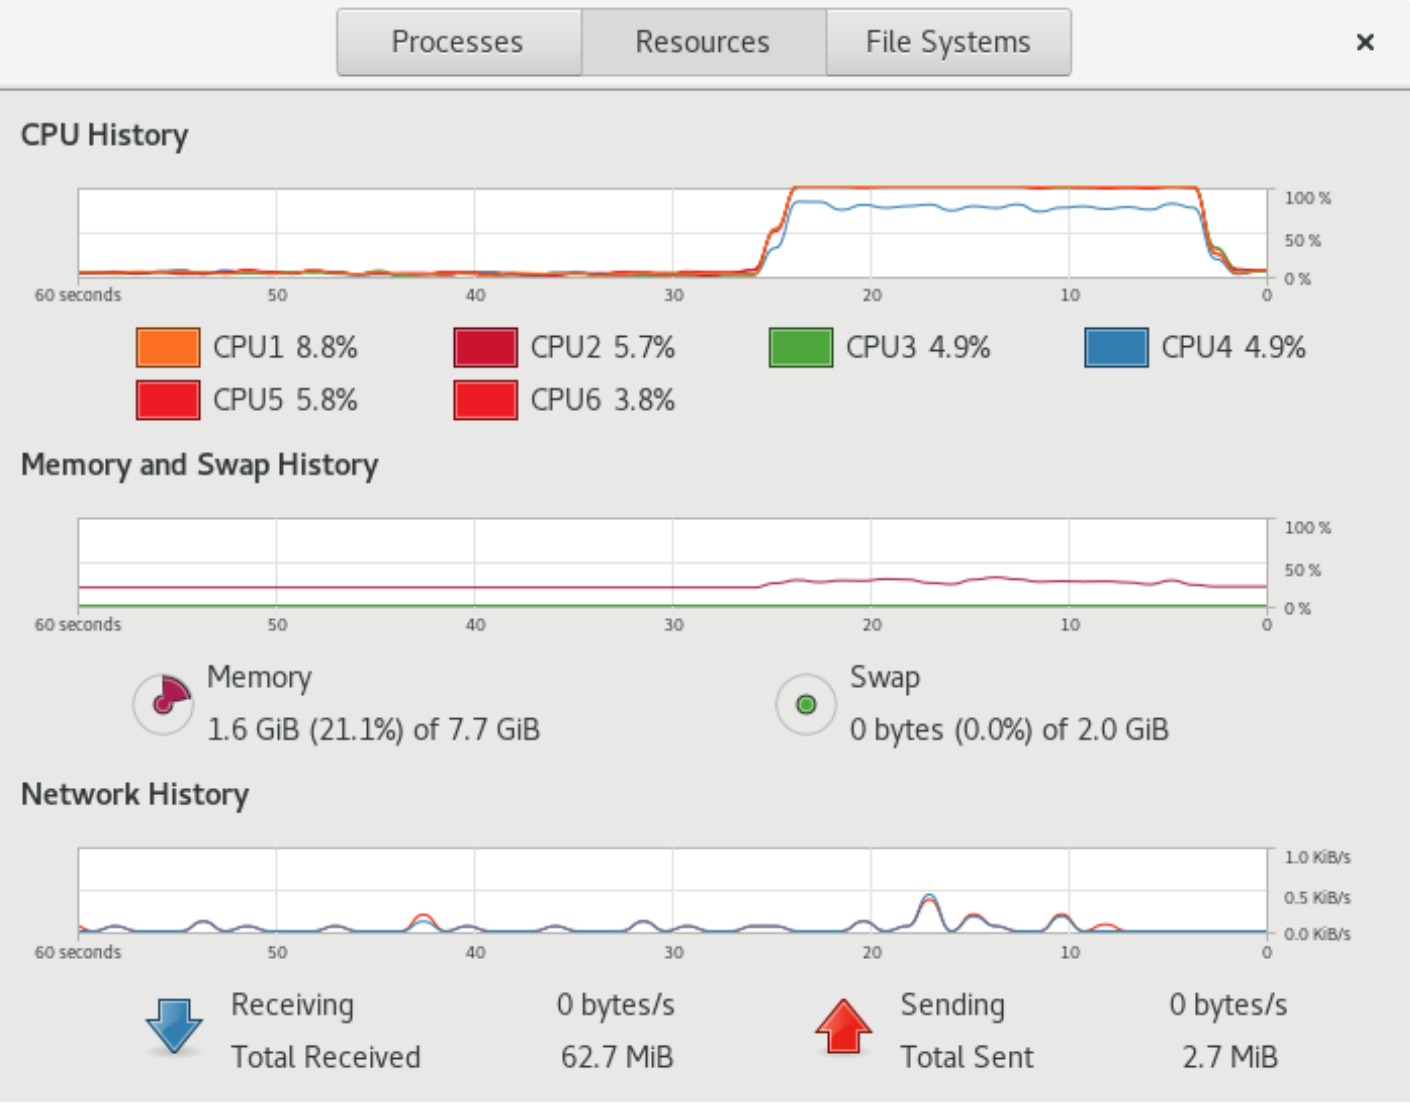
You can do similar things in Linux both from the command line and from graphical tools. In Linux, there are a few graphical tools available depending on your distribution. The most common ones are System Monitor or KSysGuard. In these tools, you can see system performance, see a list of processes, and even kill processes (Figure 3).
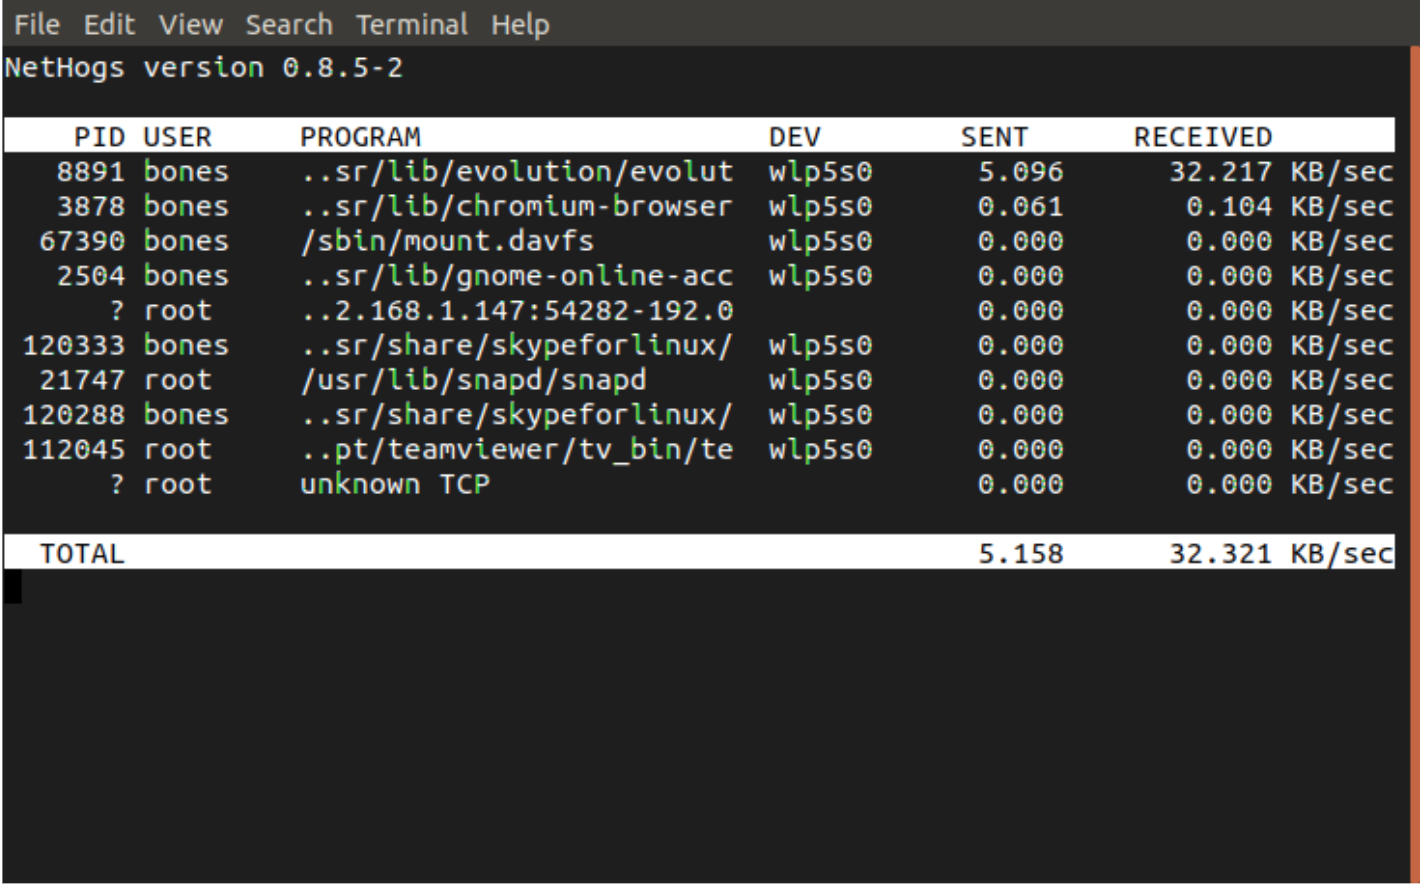
In these tools, you can also view global network traffic on your system (Figure 4).
Managing Process and System Usage
There are also quite a few tools you can use from the command line. The command ps can be used to list processes on your system. By default, it will list processes running in your current terminal session. But you can list other processes by giving it various command line options. You can get more help on ps with the commands info ps, or man ps.
Most folks though want to get a list of processes because they would like to stop the one that is using up too much memory or CPU time. In this case, there are two commands that make this task much easier. These are top and htop (Figure 5).
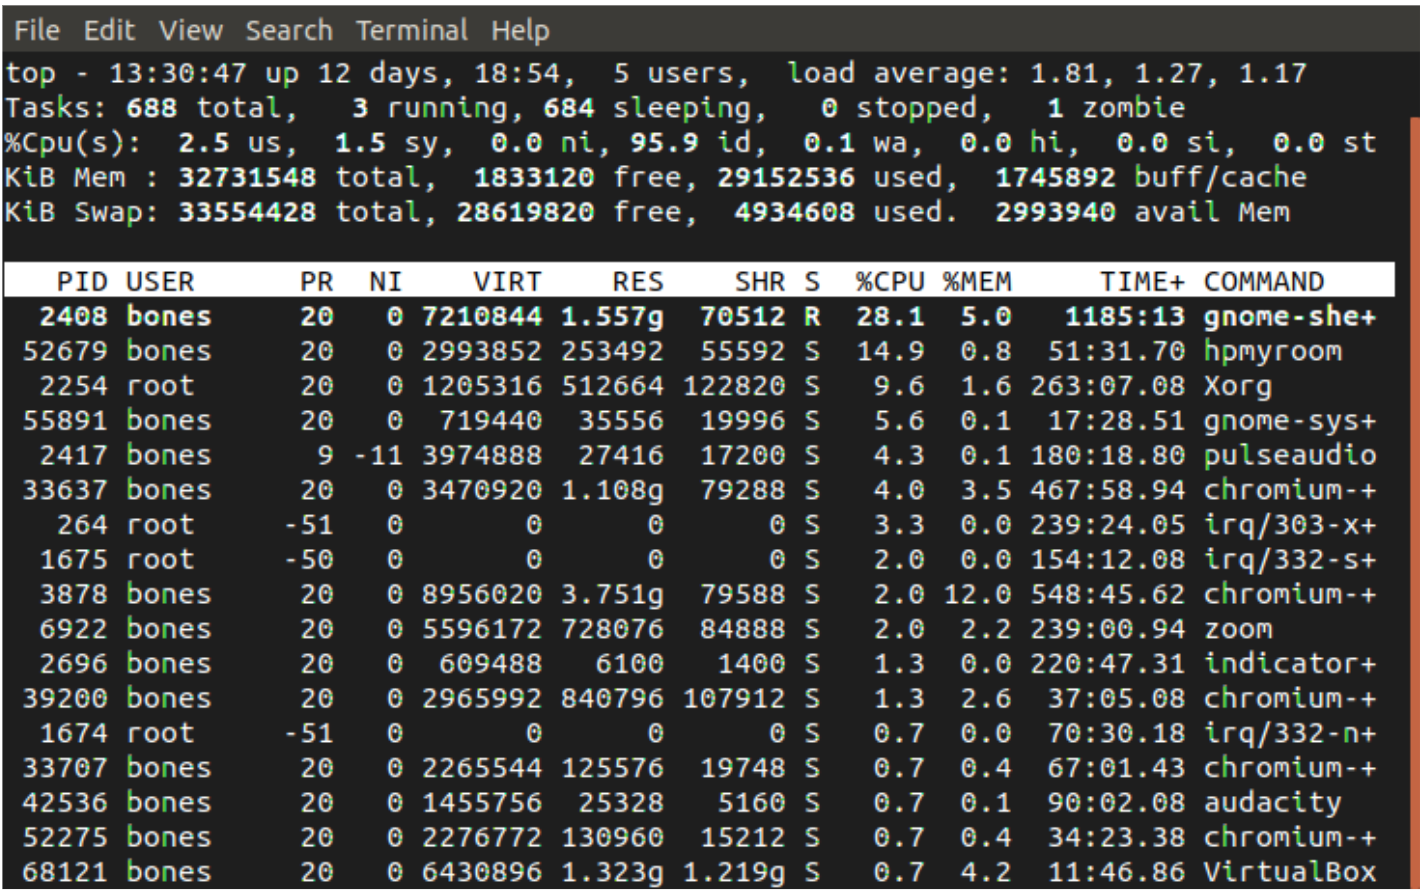
The top and htop tools work very similarly to each other. These commands update their list every second or two and re-sort the list so that the task using the most CPU is at the top. You can also change the sorting to sort by other resources as well such as memory usage.
In either of these programs (top and htop), you can type ‘?’ to get help, and ‘q’ to quit. With top, you can press ‘k’ to kill a process and then type in the unique PID number for the process to kill it.
With htop, you can highlight a task by pressing down arrow or up arrow to move the highlight bar, and then press F9 to kill the task followed by Enter to confirm.
The information and tools provided in this series will help you get started with Linux. With a little time and patience, you’ll feel right at home.
Learn more about Linux through the free “Introduction to Linux” course from The Linux Foundation and edX.


