Back in 2001, a new operating system arrived that promised to change the way users worked with their computers. That platform was BeOS and I remember it well. What I remember most about it was the desktop, and how much it looked and felt like my favorite window manager (at the time) AfterStep. I also remember how awkward and overly complicated BeOS was to install and use. In fact, upon installation, it was never all too clear how to make the platform function well enough to use on a daily basis. That was fine, however, because BeOS seemed to live in a perpetual state of “alpha release.”
That was then. This is very much now.
Now we have haiku
Bringing BeOS to life
An AfterStep joy.
No, Haiku has nothing to do with AfterStep, but it fit perfectly with the haiku meter, so work with me.
The Haiku project released it’s R1 Alpha 4 six years ago. Back in September of 2018, it finally released it’s R1 Beta 1 and although it took them eons (in computer time), seeing Haiku installed (on a virtual machine) was worth the wait … even if only for the nostalgia aspect. The big difference between R1 Beta 1 and R1 Alpha 4 (and BeOS, for that matter), is that Haiku now works like a real operating system. It’s lighting fast (and I do mean fast), it finally enjoys a modicum of stability, and has a handful of useful apps. Before you get too excited, you’re not going to install Haiku and immediately become productive. In fact, the list of available apps is quite limiting (more on this later). Even so, Haiku is definitely worth installing, even if only to see how far the project has come.
Speaking of which, let’s do just that.
Installing Haiku
The installation isn’t quite as point and click as the standard Linux distribution. That doesn’t mean it’s a challenge. It’s not; in fact, the installation is handled completely through a GUI, so you won’t have to even touch the command line.
To install Haiku, you must first download an image. Download this file into your ~/Downloads directory. This image will be in a compressed format, so once it’s downloaded you’ll need to decompress it. Open a terminal window and issue the command unzip ~/Downloads/haiku*.zip. A new directory will be created, called haiku-r1beta1XXX-anyboot (Where XXX is the architecture for your hardware). Inside that directory you’ll find the ISO image to be used for installation.
For my purposes, I installed Haiku as a VirtualBox virtual machine. I highly recommend going the same route, as you don’t want to have to worry about hardware detection. Creating Haiku as a virtual machine doesn’t require any special setup (beyond the standard). Once the live image has booted, you’ll be asked if you want to run the installer or boot directly to the desktop (Figure 1). Click Run Installer to begin the process.
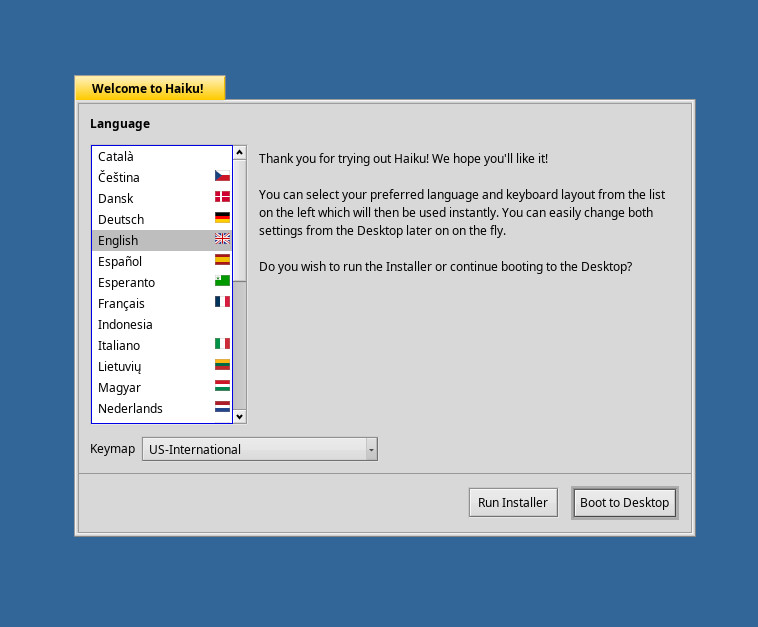
The next window is nothing more than a warning that Haiku is beta software and informing you that the installer will make the Haiku partition bootable, but doesn’t integrate with your existing boot menu (in other words, it will not set up dual booting). In this window, click the Continue button.
You will then be warned that no partitions have been found. Click the OK button, so you can create a partition table. In the remaining window (Figure 2), click the Set up partitions button.
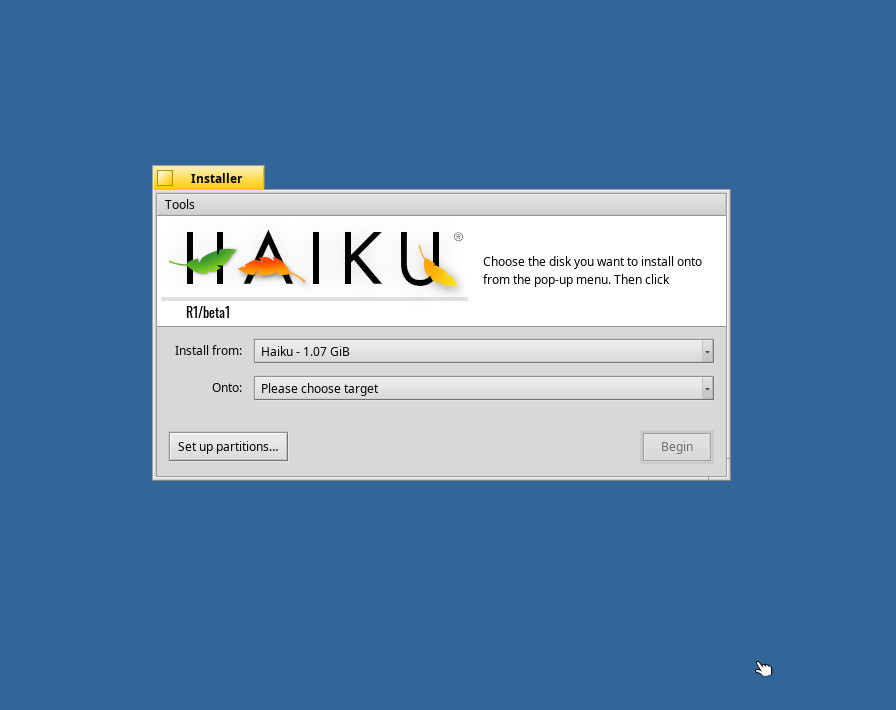
In the resulting window (Figure 3), select the partition to be used and then click Disk > Initialize > GUID Partition Map. You will be prompted to click Continue and then Write Changes.
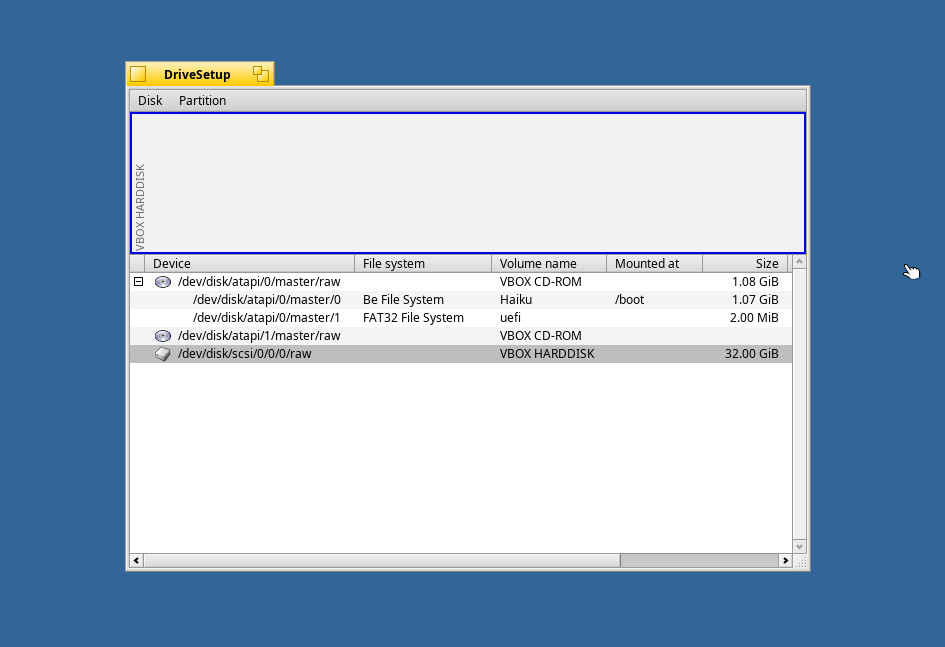
Select the newly initialized partition and then click Partition > Format > Be File System. When prompted, click Continue. In the resulting window, leave everything default and click Initialize and then click Write changes.
Close the DriveSetup window (click the square in the titlebar) to return to the Haiku Installer. You should now be able to select the newly formatted partition in the Onto drop-down (Figure 4).
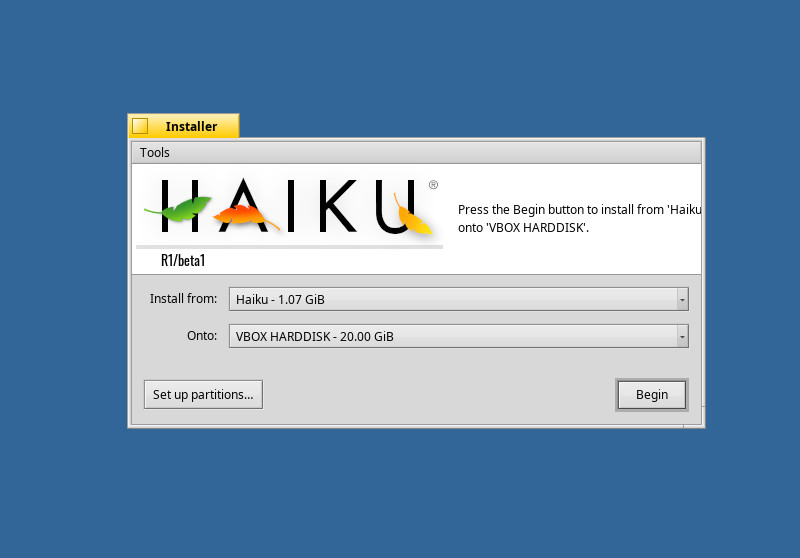
After selecting the partition, click Begin and the installation will start. Don’t blink, as the entire installation takes less than 30 seconds. You read that correctly—the installation of Haiku takes less than 30 seconds. When it finishes, click Restart to boot your newly installed Haiku OS.
Usage
When Haiku boots, it’ll go directly to the desktop. There is no login screen (or even the means to log in). You’ll be greeted with a very simple desktop that includes a few clickable icons and what is called the Tracker(Figure 5).
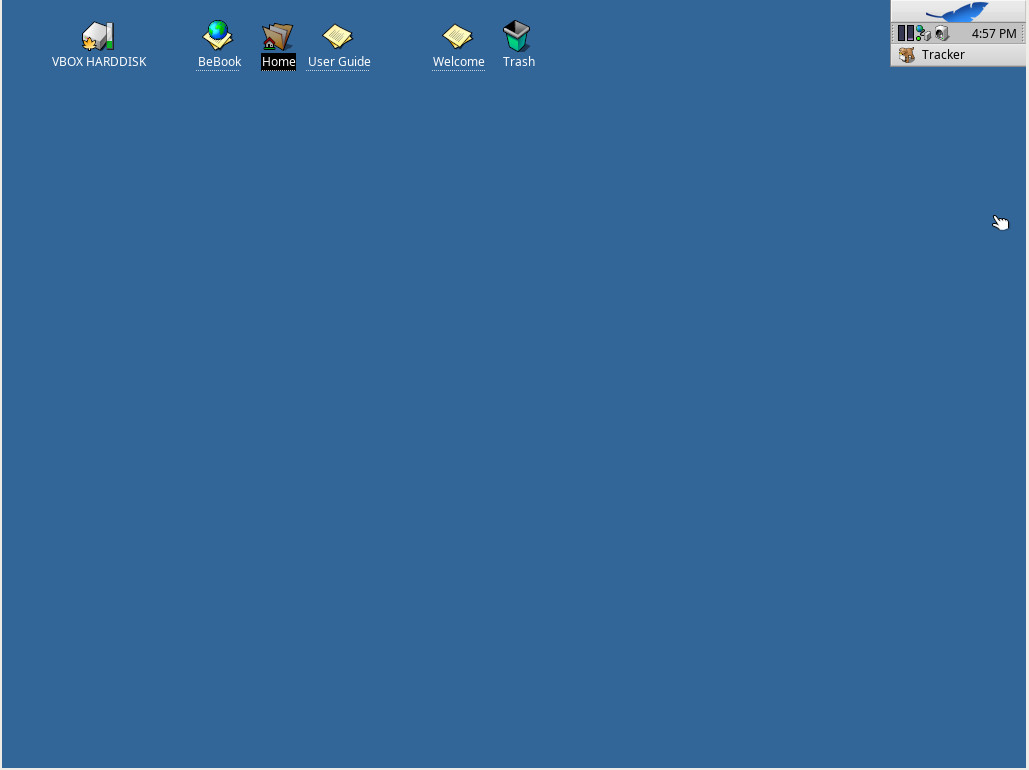
The Tracker includes any minimized application and a desktop menu that gives you access to all of the installed applications. Left click on the leaf icon in the Tracker to reveal the desktop menu (Figure 6).
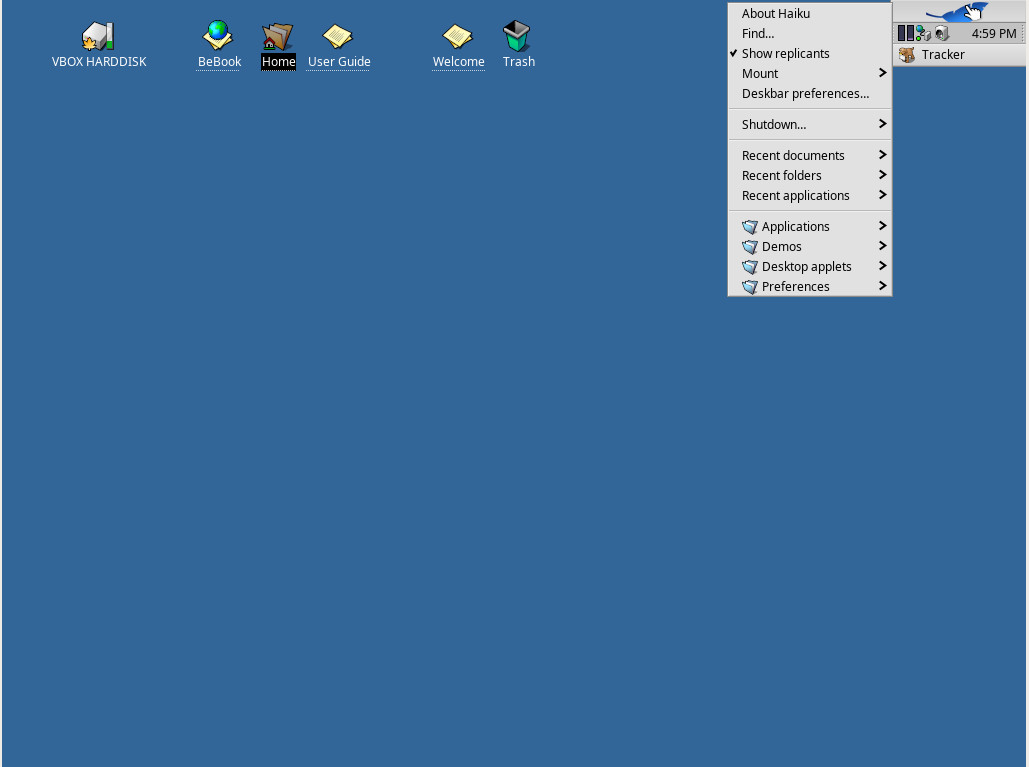
From within the menu, click Applications and you’ll see all the available tools. In that menu you’ll find the likes of:
-
ActivityMonitor (Track system resources)
-
BePDF (PDF reader)
-
CodyCam (allows you to take pictures from a webcam)
-
DeskCalc (calculator)
-
Expander (unpack common archives)
-
HaikuDepot (app store)
-
Mail (email client)
-
MediaPlay (play audio files)
-
People (contact database)
-
PoorMan (simple web server)
-
SoftwareUpdater (update Haiku software)
-
StyledEdit (text editor)
-
Terminal (terminal emulator)
-
WebPositive (web browser)
You might find, in the HaikuDepot, a limited number of available applications. At first blush, what you won’t find are many productivity tools. Missing are office suites, image editors, and more. However, if you uncheck the “Show only featured packages”, you will find a large number of applications can be found. It would be my advice, that this feature be unchecked by default, otherwise users not in the know might seem to think Haiku has a very limited scope of applications available and that this beta version of Haiku is not a true desktop replacement, but a view into the work the developers have put into giving the now-defunct BoOS new life. Even with this tiny hiccup, this blast from the past is certainly worth checking out.
A positive step forward
Based on my experience with BeOS and the alpha of Haiku (all those years ago), the developers have taken a big, positive step forward. Hopefully, the next beta release won’t take as long and we might even see a final release in the coming years. Although Haiku won’t challenge the likes of Ubuntu, Mint, Arch, or Elementary OS, it could develop its own niche following. No matter its future, it’s good to see something new from the developers. Bravo to Haiku.
Your OS is prime
For a beta 2 release
Make it so, my friends.


