Once you get over systemd’s rude departure from the plain-text, script-laden System V of yore, it turns out to be quite nifty and comes with an equally nifty toolbox. In this article, we’ll be looking at four of those tools, plus one you’re probably already familiar with but haven’t used in the way you will see here.
So, without more ado…
coredumpctl
You can use this tool, as the name implies, to retrieve coredumps from systemd’s journal.
By running:
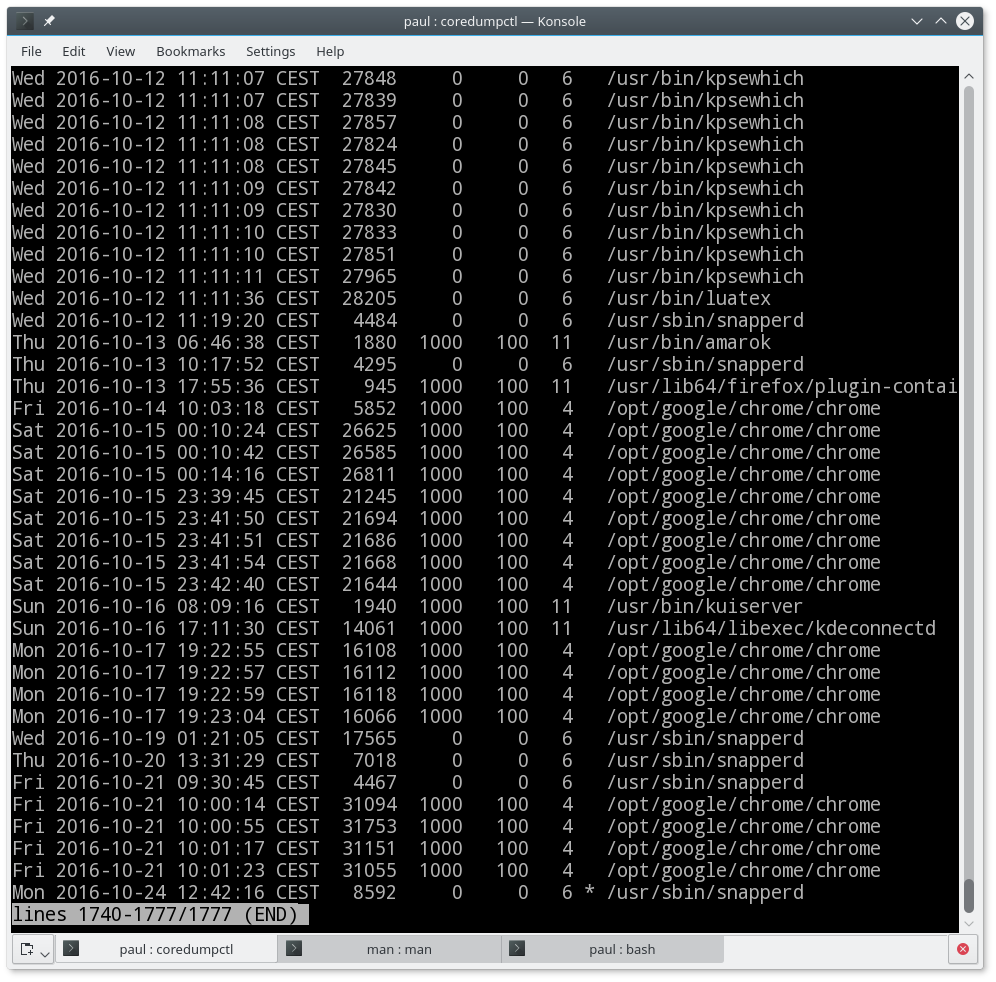
coredumpctl
you will get all coredumps in a summarized list. This list may go back weeks or even months.

By using
coredumpctl dump filter
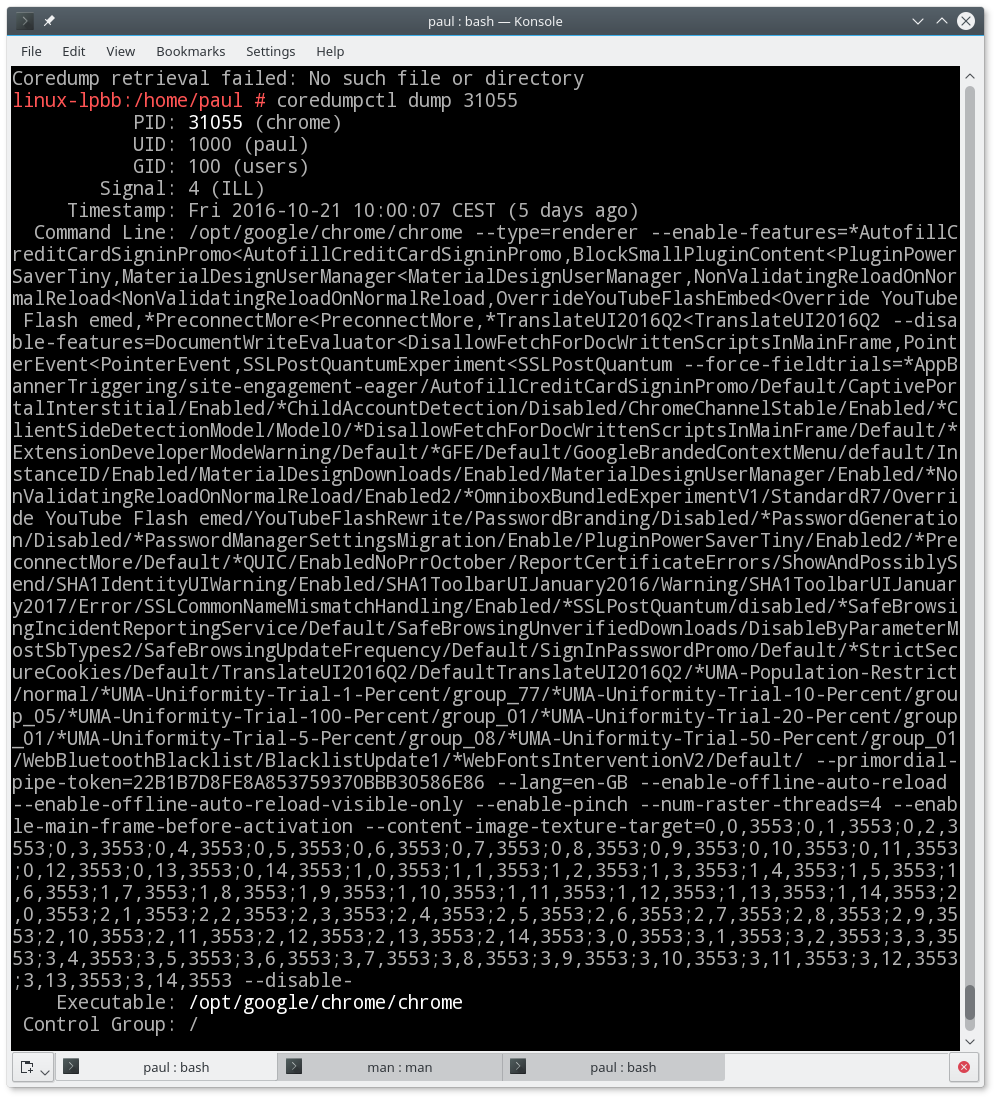
you get a more detailed output about the last coredump that matches the filter. So,
coredumpctl dump 1758
will show all the details of the last coredump with PID 1758. As systemd’s journal broaches more than one session (mine goes back to May, for example), it is conceivable that there are several unrelated coredumps from processes with the same PID.

Likewise, if you filter using the name of the executable, for example, with:
coredumpctl dump chrome
you will see only the latest coredump for chrome. This makes sense, because it is probably the one you want and the most relevant to your current problem.
You can filter coredumps using PID (as shown above), the name of the executable (also shown above), by specifying the path to the executable (it must contain at least one slash, as in /usr/bin/name_of_executable), or use one or several of journalctl‘s general predicates. An example of the latter would be:
coredumpctl dump _PID=1758
which would be the same as the coredumpctl dump 1758 we saw above.
Another, more interesting example of using journalctl predicates would be to use a coredump’s timestamp:
coredumpctl dump _SOURCE_REALTIME_TIMESTAMP=1463932674907840
For a list of all journalctl’s predicates, have a look at the JOURNAL FIELDS section in man systemd.directives.
If instead of using the dump option, you use
coredumpctl gdb 1758
you will get all the details of the coredump and you will open the GNU debugger (gdb) so you can start debugging right away.
bootctl
Just in case you missed the memo, systemd-boot and not GRUB, is also in charge of the booting firmware now. Yes! That is yet another thing systemd has gobbled down its hungry maw, at least on most modern machines with a UEFI firmware.
Although learning how to configure a boot manager from scratch goes beyond the scope of this post (if you are really interested, this article may prove helpful), when you have done your custom configuration, you will need to use bootctl to get it installed.
(If you’re a Linux newbie, fear not: you will probably never have to do any of what is covered in this section. Your distro will do it for you. This is for Linux control freaks, aka Arch users, who can’t resist messing with every single aspect of their system.)
You need to be root (or invoke the command with sudo) to use bootctl. This may be the first indication that you should treat this command with respect: Misusing bootctl can render your system unbootable, so be careful.
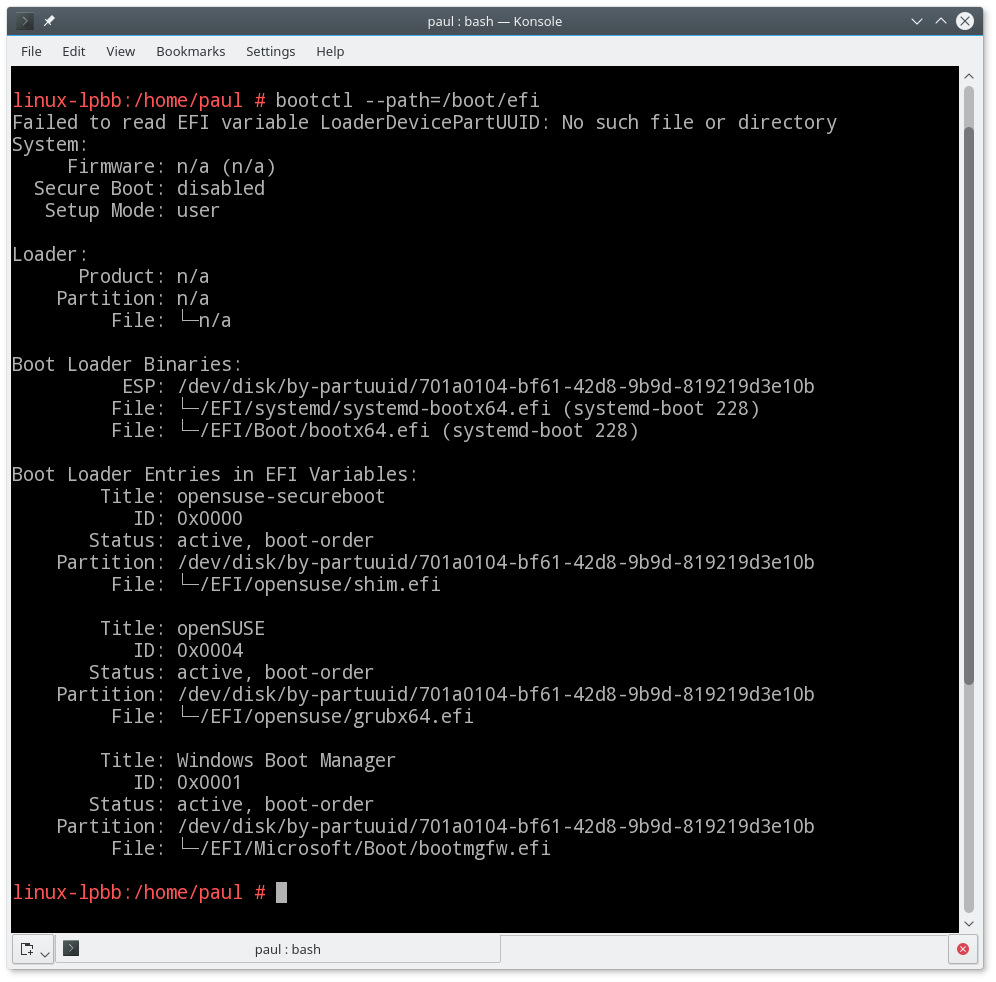
A harmless way of leveraging bootctl is to use it to check the boot status of your machine. Note that, unless /boot points directly to an FAT EFI partition, you will have to specify the route to the EFI boot partition manually using the --path= option. In my openSUSE, for example, I have to do:
bootctl --path=/boot/efi
This will list all the boot options and their variables. You can see what my boot looks like in Figure 3. This is the default behavior and is the same as bootctl --path=/boot/efi status.

The output shows where the boot binary is stored (ESP:) and each of the bootable options.
If you’ve built your own boot manager framework, you can install it with:
bootctl --path=/boot/path/to/efi install
This also generates the binary systemd-boot file and stores it in boot/path/to/efi/EFI/Boot and adds a call to it at the top of boot order list.
If you have a newer version than the one installed in the EFI partition, you can update your systemd-boot with:
bootctl --path=/boot/path/to/efi update
You can remove systemd-boot from your EFI partition with:
bootctl --path=/boot/path/to/efi remove
Needless to say, be careful with this last one.
systemd-cgtop
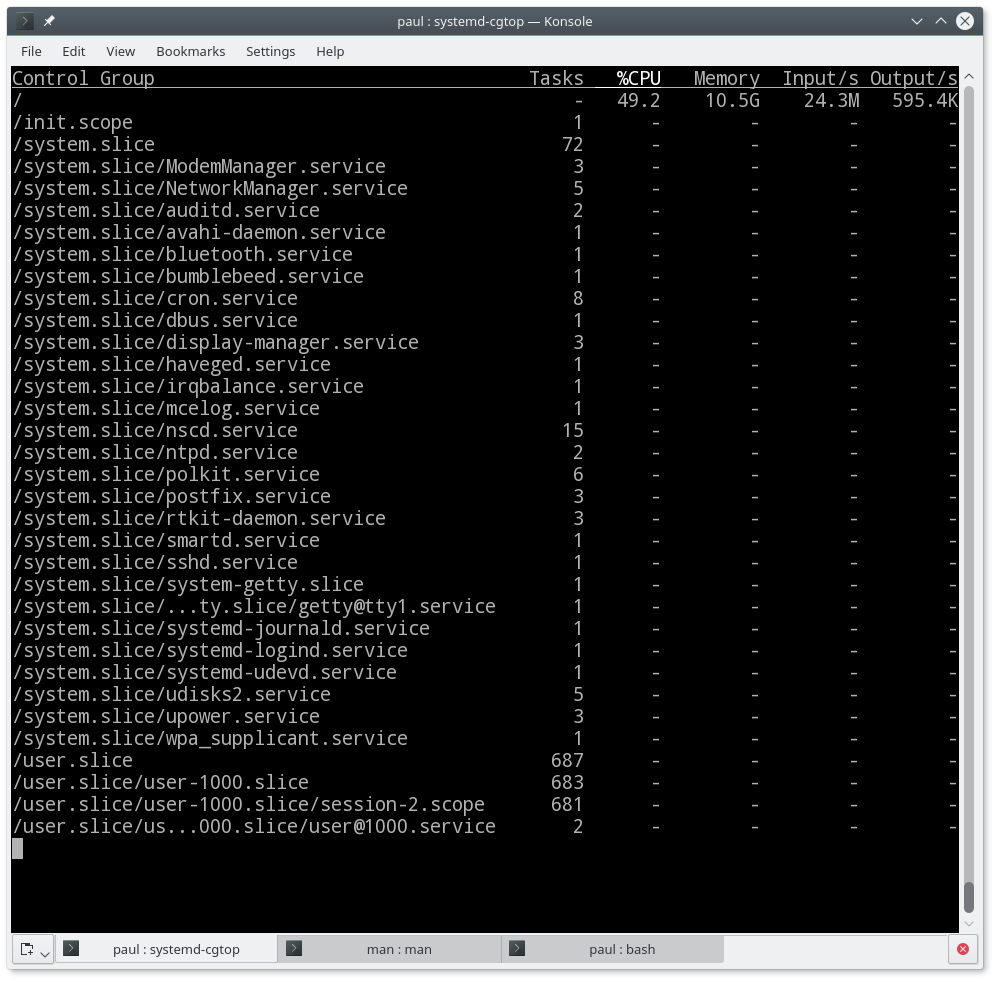
Similar to the classic top tool that tells you which process is hogging your resources, systemd-cgtop tells you which cgroup is eating up most of your CPU cycles and memory.
If you are not familiar with control groups — cgroups for short — they provide a way of partitioning off resources for groups of users and tasks. You can, for example, use cgroups to set the limits of CPU and memory usage on a machine shared between two different groups of users and the applications they use. There is a complete explanation with examples on how to use and implement cgroups here.
systemd relies heavily on cgroups to control its services and systemd-cgtop is how you check that none of the groups are getting out of hand. And, If it is, you can then kill the whole group without needing to actually hunt down each of the processes in the group and killing them individually.
Look at Figure 4. What you see there is the very image of a sane and happy system. Nothing is hogging resources, and only some of all the activity of all the cgroups is registering at all. But I could, for example, get rid of the auditd service if it were misbehaving. As it is not essential to keep the system running, I can do this with:
systemctl kill auditd.service
And… poof! It’s gone!

In this case, auditd.service has only got to tasks associated with it, but, as you can see, some have literally hundreds, especially groups used for end users, so using systemctl to call cgroups is very convenient.
By the way, if you want to see the processes within a given cgroup, try this:
systemd-cgls /cgroup.name
For example, try this:
systemd-cgls /system.slice/NetworkManager.service
And you’ll see all the processes working under the NetworkManager sub-cgroup.
Conclusion
This was a just a taste of the tools systemd has for system administration. Not only are there many more (and we’ll be looking at a new batch in a future article), but also the options and combinations you can use with these instructions make them much more powerful than they seem at first glance.
If you would like to delve more deeply into systemd, use:
man systemd.index
to get an overview of all the man pages related with systemd.
Advance your career in Linux System Administration! Check out the online Essentials of System Administration course from The Linux Foundation — also offered in Spanish and Portuguese.


