How many times have you dived deep into Ubuntu (or a Ubuntu derivative), configuring things and installing software, only to find that your desktop (or server) platform isn’t exactly what you wanted. This situation can be problematic when you already have all of your user files on the machine. In this case, you have a choice, you can either back up all your data, reinstall the operating system, and copy your data back onto the machine, or you can give a tool like Resetter a go.
Resetter is a new tool (written by Canadian developer that goes by the name “gaining”), written in Python and pyqt, that will reset Ubuntu, Linux Mint (and a few other, Ubuntu-based distributions) back to stock configurations. Resetter offers two different reset options: Automatic and Custom. With the Automatic option, the tool will:
-
Remove user-installed apps
-
Delete users and home directories
-
Create default backup user
-
Auto install missing pre-installed apps (MPIAs)
-
Remove non-default users
-
Remove snap packages
The Custom option will:
-
Remove user-installed apps or allow you to select which apps to remove
-
Remove old kernels
-
Allow you to choose users to delete
-
Delete users and home directories
-
Create default backup user
-
Allow you to create custom backup user
-
Auto install MPIAs or chose which MPIAs to install
-
Remove non-default users
-
View all dependent packages
-
Remove snap packages
I’m going to walk you through the process of installing and using Resetter. However, I must tell you that this tool is very much in beta. Even so, resetter is definitely worth a go. In fact, I would encourage you to test the app and submit bug reports (you can either submit them via GitHub or send them directly to the developer’s email address, gaining7@outlook.com).
It should also be noted that, at the moment, the only supported distributions are:
-
Debian 9.2 (stable) Gnome edition
-
Linux Mint 17.3+ (support for mint 18.3 coming soon)
-
Ubuntu 14.04+ (Although I found 17.10 not supported)
-
Elementary OS 0.4+
-
Linux Deepin 15.4+
With that said, let’s install and use Resetter. I’ll be demonstrating on Elementary OS Loki.
Installation
There are a couple of ways to install Resetter. The method I chose is by way of the gdebi helper app. Why? Because it will pick up all the necessary dependencies for installation. First, we must install that particular tool. Open up a terminal window and issue the command:
sudo apt install gdebi
Once that is installed, point your browser to the Resetter Download Page and download the most recent version of the software. Once it has downloaded, open up the file manager, navigate to the downloaded file, and click (or double-click, depending on how you’ve configured your desktop) on the resetter_XXX-stable_all.deb file (where XXX is the release number). The gdebi app will open (Figure 1). Click on the Install Package button, type your sudo password, and Resetter will install.
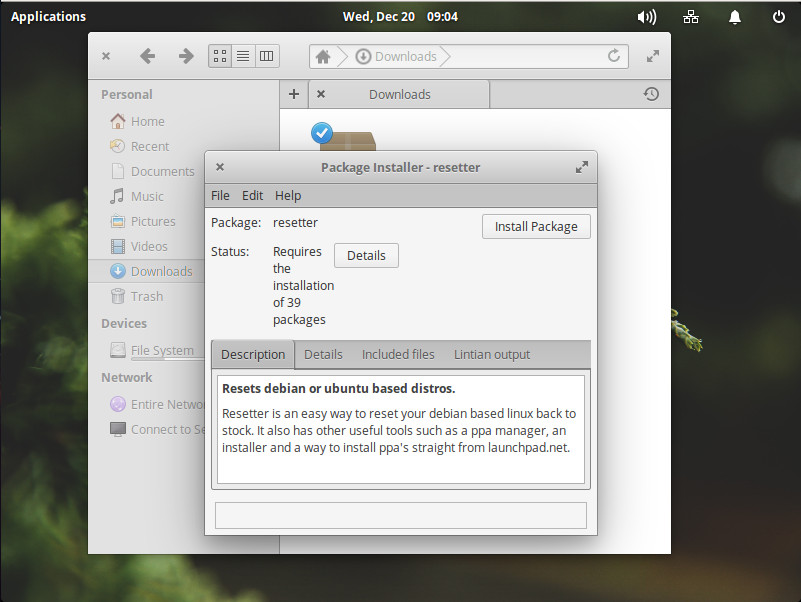
Once Resetter is installed, you’re ready to go.
Using Resetter
Remember, before you do this, you must back up your data. You’ve been warned.
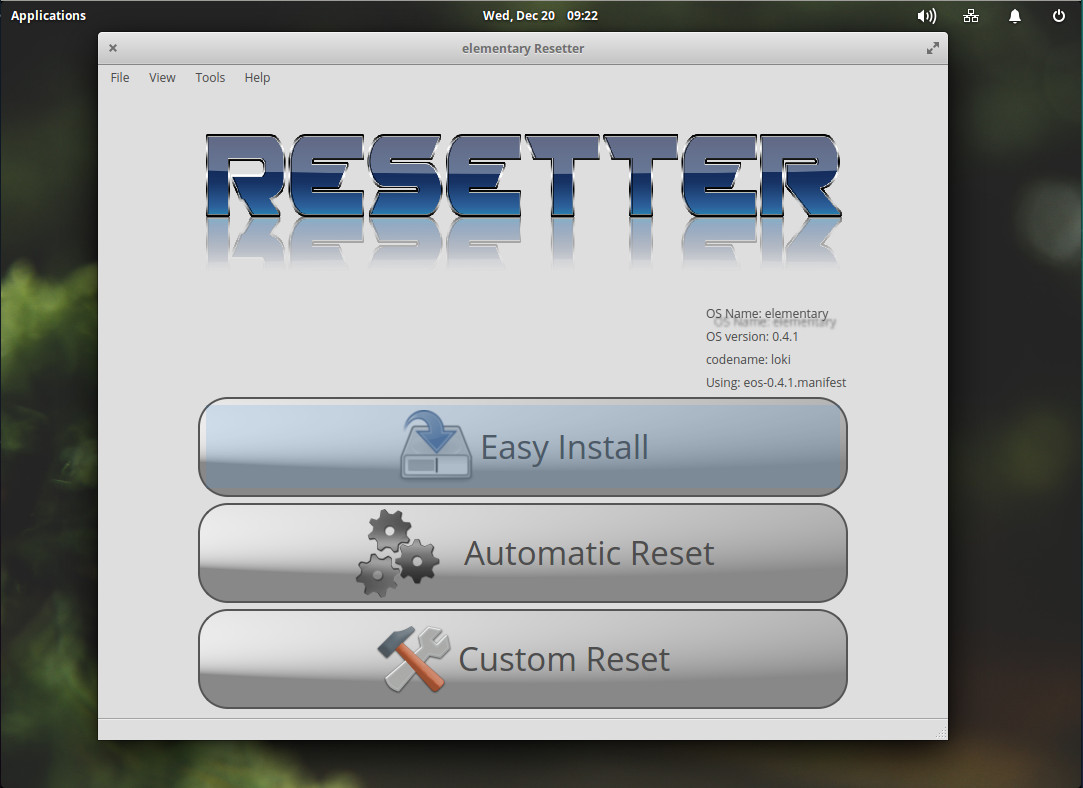
From your terminal window, issue the command sudo resetter. You’ll be prompted for your sudo password. Once Resetter opens, it will automatically detect your distribution (Figure 2).
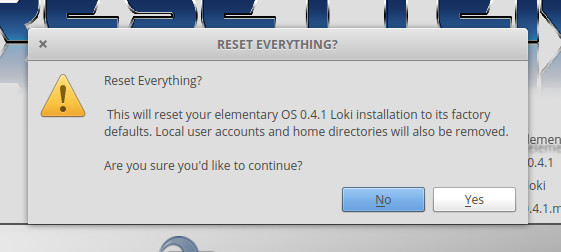
We’re going to test the Resetter waters by running an automatic reset. From the main window, click Automatic Reset. The app will offer up a clear warning that it is about to reset your operating system (in my case, Elementary OS 0.4.1 Loki) to its factory defaults (Figure 3).
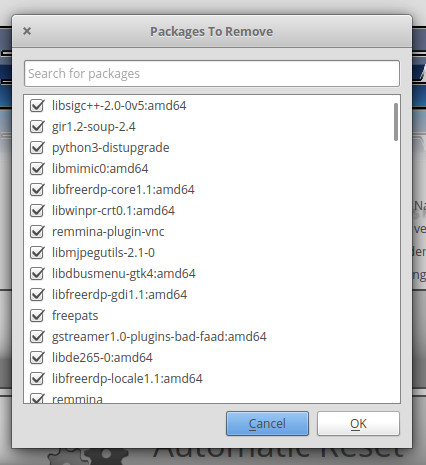
Once you click Yes, Resetter will display all of the packages it will remove (Figure 4). If you’re okay with that, click OK and the reset will begin.
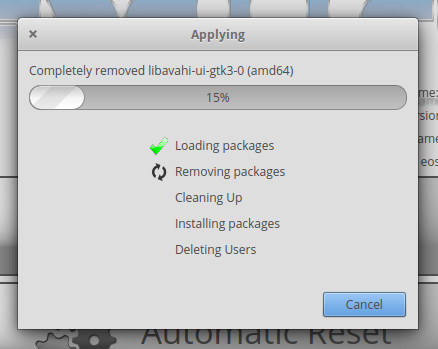
During the reset, the application will display a progress window (Figure 5). Depending upon how much you’ve installed, the process shouldn’t take too long.
When the process completes, Resetter will display a new username and password for you to use, in order to log back into your newly reset distribution (Figure 6).
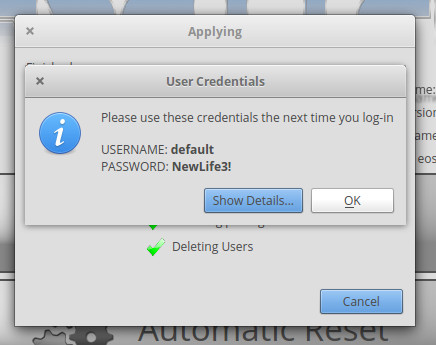
Click OK and then, when prompted, click Yes to reboot the system. Once you are prompted to login, use the new credentials given to you by the Resetter app. After a successful login, you’ll need to recreate your original user. That user’s home directory will still be intact, so all you need to do is issue the command sudo useradd USERNAME (where USERNAME is the name of the user). Once you’ve done that, issue the command sudo passwd USERNAME (where USERNAME is the name of the user). With the user/password set, you can log out and log back in as your old user (enjoying the same home directory you had before resetting the operating system).
My results
I have to confess, after adding the password back to my old user (and testing it by using the su command to change to that user), I was unable to log into the Elementary OS desktop with that user. To solve that problem, I logged in with the Resetter-created user, moved the old user home directory, deleted the old user (with the command sudo deluser jack), and recreated the old user (with the command sudo useradd -m jack).
After doing that, I checked the original home directory, only to find out the ownership had been changed from jack.jack to 1000.1000. That could have been fixed simply by issuing the command sudo chown -R jack.jack /home/jack. The lesson? If you use Resetter and find you cannot log in with your old user (after you’ve re-created user and given it a new password), make sure to change the ownership of the user’s home directory.
Outside of that on issue, Resetter did a great job of taking Elementary OS Loki back to a default state. Although Resetter is in beta, it’s a rather impressive tool. Give it a try and see if you don’t have the same outstanding results I did.
Learn more about Linux through the free “Introduction to Linux” course from The Linux Foundation and edX.


