If you’re a Linux systems administrator, one of the first tools you will turn to for troubleshooting are log files. These files hold crucial information that can go a long way to help you solve problems affecting your desktops and servers. For many sysadmins (especially those of an old-school sort), nothing beats the command line for checking log files. But for those who’d rather have a more efficient (and possibly modern) approach to troubleshooting, there are plenty of options.
In this article, I’ll highlight a few such tools available for the Linux platform. I won’t be getting into logging tools that might be specific to a certain service (such as Kubernetes or Apache), and instead will focus on tools that work to mine the depths of all that magical information written into /var/log.
Speaking of which…
What is /var/log?
If you’re new to Linux, you might not know what the /var/log directory contains. However, the name is very telling. Within this directory is housed all of the log files from the system and any major service (such as Apache, MySQL, MariaDB, etc.) installed on the operating system. Open a terminal window and issue the command cd /var/log. Follow that with the command ls and you’ll see all of the various systems that have log files you can view (Figure 1).
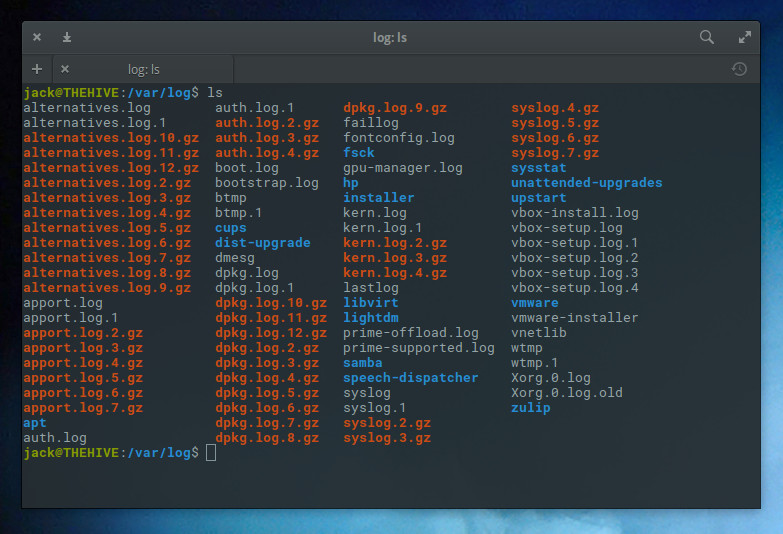
Say, for instance, you want to view the syslog log file. Issue the command less syslog and you can scroll through all of the gory details of that particular log. But what if the standard terminal isn’t for you? What options do you have? Plenty. Let’s take a look at few such options.
Logs
If you use the GNOME desktop (or other, as Logs can be installed on more than just GNOME), you have at your fingertips a log viewer that mainly just adds the slightest bit of GUI goodness over the log files to create something as simple as it is effective. Once installed (from the standard repositories), open Logs from the desktop menu, and you’ll be treated to an interface (Figure 2) that allows you to select from various types of logs (Important, All, System, Security, and Hardware), as well as select a boot period (from the top center drop-down), and even search through all of the available logs.
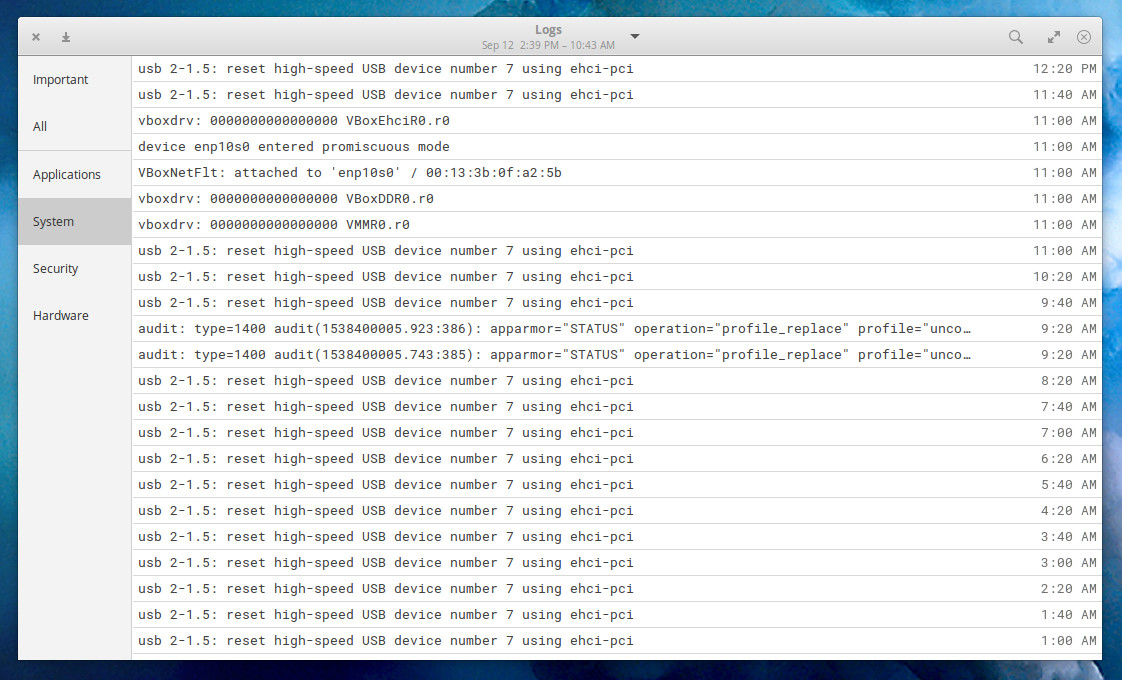
Logs is a great tool, especially if you’re not looking for too many bells and whistles getting in the way of you viewing crucial log entries, so you can troubleshoot your systems.
KSystemLog
KSystemLog is to KDE what Logs is to GNOME, but with a few more features to add into the mix. Although both make it incredibly simple to view your system log files, only KSystemLog includes colorized log lines, tabbed viewing, copy log lines to the desktop clipboard, built-in capability for sending log messages directly to the system, read detailed information for each log line, and more. KSystemLog views all the same logs found in GNOME Logs, only with a different layout.
From the main window (Figure 3), you can view any of the different log (from System Log, Authentication Log, X.org Log, Journald Log), search the logs, filter by Date, Host, Process, Message, and select log priorities.
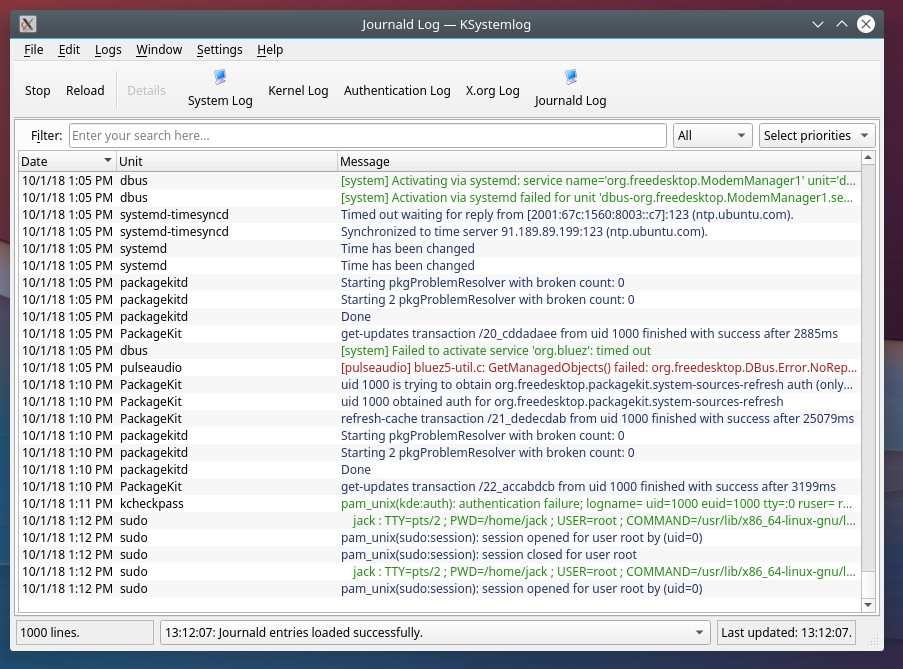
If you click on the Window menu, you can open a new tab, where you can select a different log/filter combination to view. From that same menu, you can even duplicate the current tab. If you want to manually add a log to a file, do the following:
-
Open KSystemLog.
-
Click File > Add Log Entry.
-
Create your log entry (Figure 4).
-
Click OK
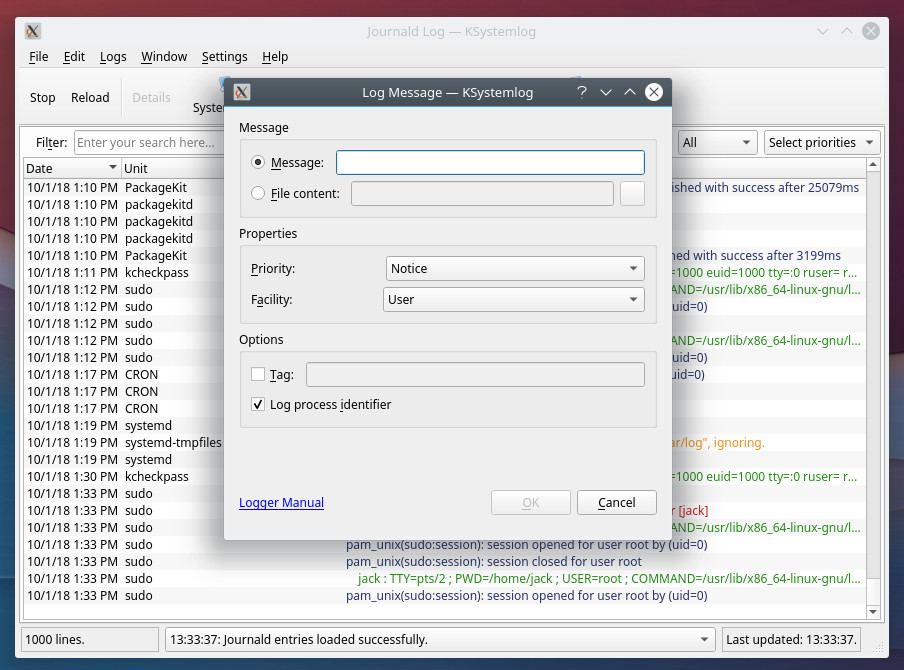
KSystemLog makes viewing logs in KDE an incredibly easy task.
Logwatch
Logwatch isn’t a fancy GUI tool. Instead, logwatch allows you to set up a logging system that will email you important alerts. You can have those alerts emailed via an SMTP server or you can simply view them on the local machine. Logwatch can be found in the standard repositories for almost every distribution, so installation can be done with a single command, like so:
sudo apt-get install logwatch
Or:
sudo dnf install logwatch
During the installation, you will be required to select the delivery method for alerts (Figure 5). If you opt to go the local mail delivery only, you’ll need to install the mailutils app (so you can view mail locally, via the mail command).
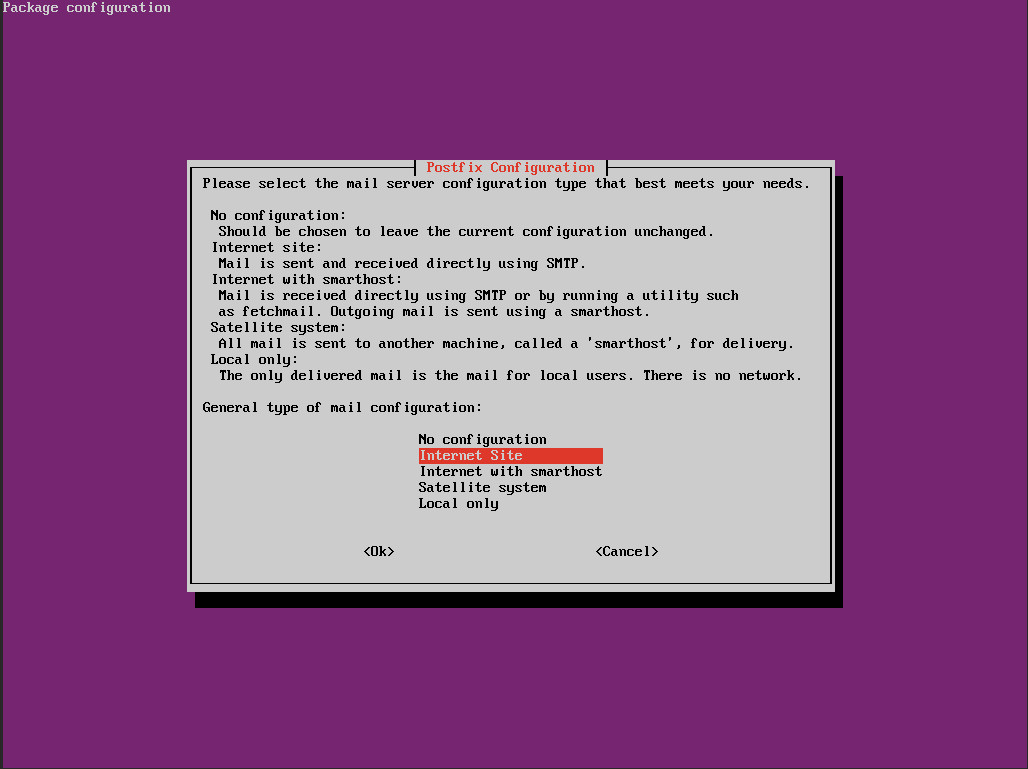
All Logwatch configurations are handled in a single file. To edit that file, issue the command sudo nano /usr/share/logwatch/default.conf/logwatch.conf. You’ll want to edit the MailTo = option. If you’re viewing this locally, set that to the Linux username you want the logs sent to (such as MailTo = jack). If you are sending these logs to an external email address, you’ll also need to change the MailFrom = option to a legitimate email address. From within that same configuration file, you can also set the detail level and the range of logs to send. Save and close that file.
Once configured, you can send your first mail with a command like:
logwatch --detail Med --mailto ADDRESS --service all --range today
Where ADDRESS is either the local user or an email address.
For more information on using Logwatch, issue the command man logwatch. Read through the manual page to see the different options that can be used with the tool.
Rsyslog
Rsyslog is a convenient way to send remote client logs to a centralized server. Say you have one Linux server you want to use to collect the logs from other Linux servers in your data center. With Rsyslog, this is easily done. Rsyslog has to be installed on all clients and the centralized server (by issuing a command like sudo apt-get install rsyslog). Once installed, create the /etc/rsyslog.d/server.conf file on the centralized server, with the contents:
# Provide UDP syslog reception
$ModLoad imudp
$UDPServerRun 514

# Provide TCP syslog reception
$ModLoad imtcp
$InputTCPServerRun 514

# Use custom filenaming scheme
$template FILENAME,"/var/log/remote/%HOSTNAME%.log"
*.* ?FILENAME

$PreserveFQDN on
Save and close that file. Now, on every client machine, create the file /etc/rsyslog.d/client.conf with the contents:
$PreserveFQDN on
$ActionQueueType LinkedList
$ActionQueueFileName srvrfwd
$ActionResumeRetryCount -1
$ActionQueueSaveOnShutdown on
*.* @@SERVER_IP:514
Where SERVER_IP is the IP address of your centralized server. Save and close that file. Restart rsyslog on all machines with the command:
sudo systemctl restart rsyslog
You can now view the centralized log files with the command (run on the centralized server):
tail -f /var/log/remote/*.log
The tail command allows you to view those files as they are written to, in real time. You should see log entries appear that include the client hostname (Figure 6).
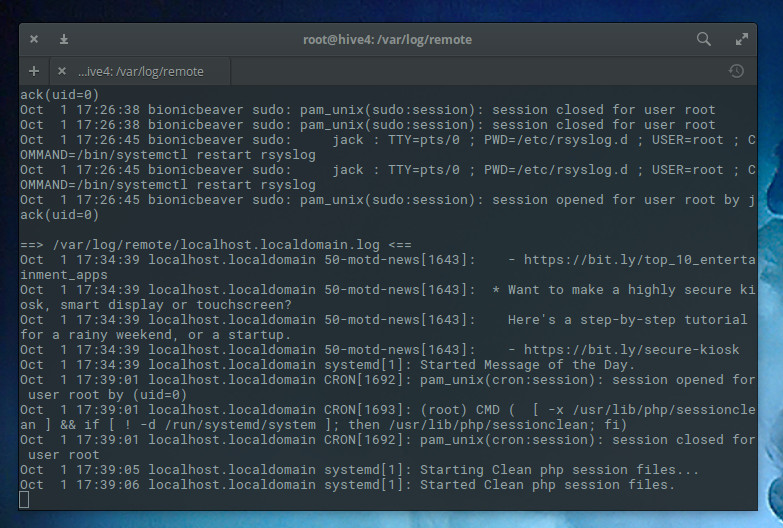
Rsyslog is a great tool for creating a single point of entry for viewing the logs of all of your Linux servers.
More where that came from
This article only scratched the surface of the logging tools to be found on the Linux platform. And each of the above tools is capable of more than what is outlined here. However, this overview should give you a place to start your long day’s journey into the Linux log file.
Learn more about Linux through the free “Introduction to Linux” course from The Linux Foundation and edX.


