If you’re a developer, then you know your way around development tools. You’ve spent years studying one or more programming languages and have perfected your skills. You can develop with GUI tools or from the command line. On your own, nothing can stop you. You code as if your mind and your fingers are one to create elegant, perfectly commented, source for an app you know will take the world by storm.
But what happens when you’re tasked with collaborating on a project? Or what about when that app you’ve developed becomes bigger than just you? What’s the next step? If you want to successfully collaborate with other developers, you’ll want to make use of a distributed version control system. With such a system, collaborating on a project becomes incredibly efficient and reliable. One such system is Git. Along with Git comes a handy repository called GitHub, where you can house your projects, such that a team can check out and check in code.
I will walk you through the very basics of getting Git up and running and using it with GitHub, so the development on your game-changing app can be taken to the next level. I’ll be demonstrating on Ubuntu 18.04, so if your distribution of choice is different, you’ll only need to modify the Git install commands to suit your distribution’s package manager.
Git and GitHub
The first thing to do is create a free GitHub account. Head over to the GitHub signup page and fill out the necessary information. Once you’ve done that, you’re ready to move on to installing Git (you can actually do these two steps in any order).
Installing Git is simple. Open up a terminal window and issue the command:
sudo apt install git-all
This will include a rather large number of dependencies, but you’ll wind up with everything you need to work with Git and GitHub.
On a side note: I use Git quite a bit to download source for application installation. There are times when a piece of software isn’t available via the built-in package manager. Instead of downloading the source files from a third-party location, I’ll often go the project’s Git page and clone the package like so:
git clone ADDRESS
Where ADDRESS is the URL given on the software’s Git page.
Doing this most always ensures I am installing the latest release of a package.
Create a local repository and add a file
The next step is to create a local repository on your system (we’ll call it newproject and house it in ~/). Open up a terminal window and issue the commands:
cd ~/

mkdir newproject

cd newproject
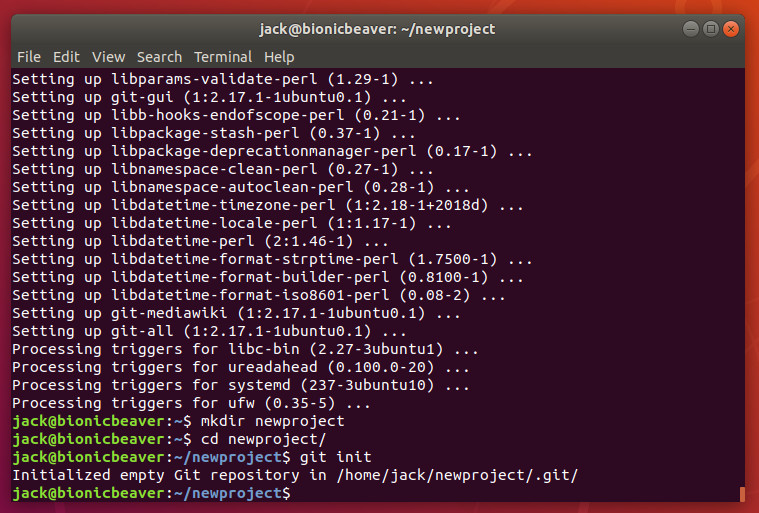
Now we must initialize the repository. In the ~/newproject folder, issue the command git init. When the command completes, you should see that the empty Git repository has been created (Figure 1).
Next we need to add a file to the project. From within the root folder (~/newproject) issue the command:
touch readme.txt
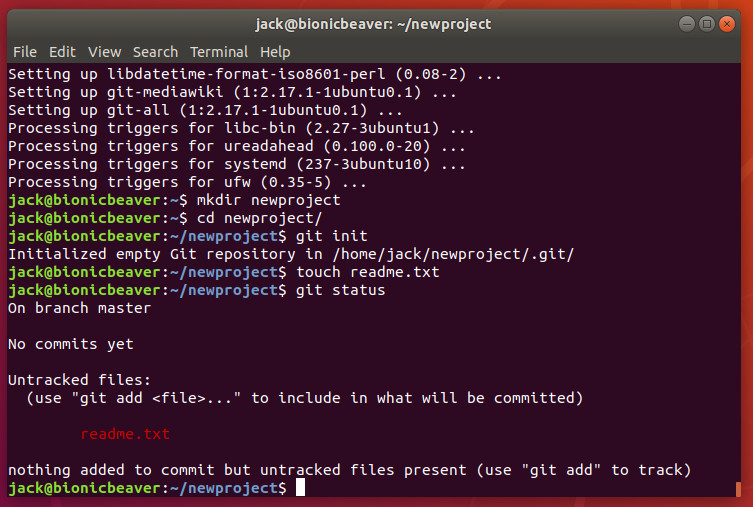
You will now have an empty file in your repository. Issue the command git status to verify that Git is aware of the new file (Figure 2).
Even though Git is aware of the file, it hasn’t actually been added to the project. To do that, issue the command:
git add readme.txt
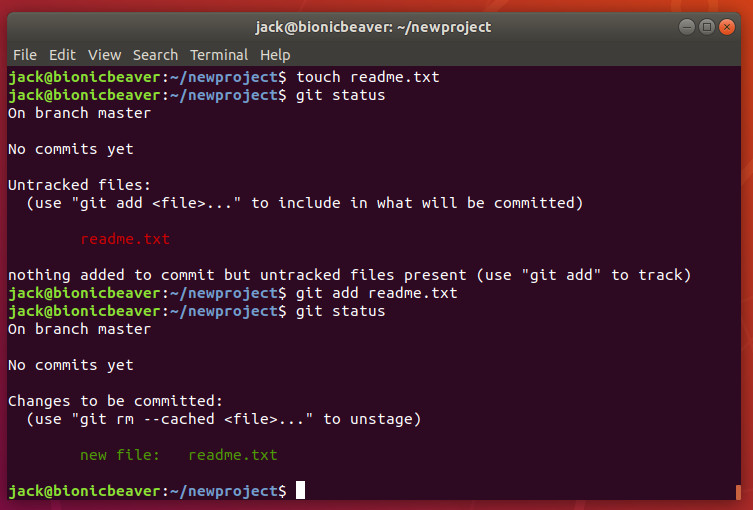
Once you’ve done that, issue the git status command again to see that readme.txt is now considered a new file in the project (Figure 3).
Your first commit
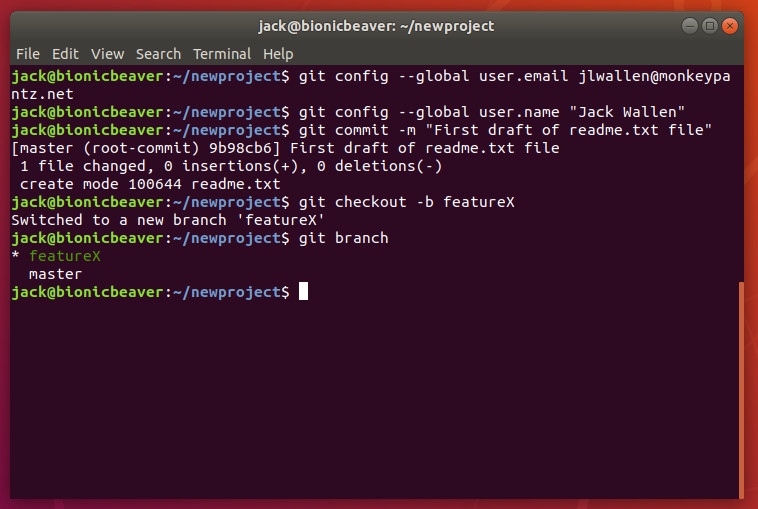
With the new file in the staging environment, you are now ready to create your first commit. What is a commit? Easy: A commit is a record of the files you’ve changed within the project. Creating the commit is actually quite simple. It is important, however, that you include a descriptive message for the commit. By doing this, you are adding notes about what the commit contains (such as what changes you’ve made to the file). Before we do this, however, we have to inform Git who we are. To do this, issue the command:
git config --global user.email EMAIL

git config --global user.name “FULL NAME”
Where EMAIL is your email address and FULL NAME is your name.
Now we can create the commit by issuing the command:
git commit -m “Descriptive Message”
Where Descriptive Message is your message about the changes within the commit. For example, since this is the first commit for the readme.txt file, the commit could be:
git commit -m “First draft of readme.txt file”
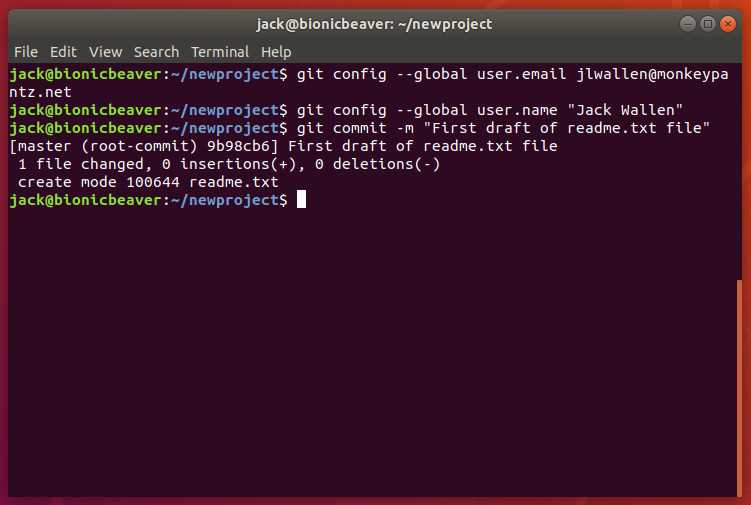
You should see output indicating that 1 file has changed and a new mode was created for readme.txt (Figure 4).
Create a branch and push it to GitHub
Branches are important, as they allow you to move between project states. Let’s say you want to create a new feature for your game-changing app. To do that, create a new branch. Once you’ve completed work on the feature you can merge this feature from the branch to the master branch. To create the new branch, issue the command:
git checkout -b BRANCH
where BRANCH is the name of the new branch. Once the command completes, issue the command git branch to see that it has been created (Figure 5).
Next we need to create a repository on GitHub. If you log into your GitHub account, click the New Repository button from your account main page. Fill out the necessary information and click Create repository (Figure 6).
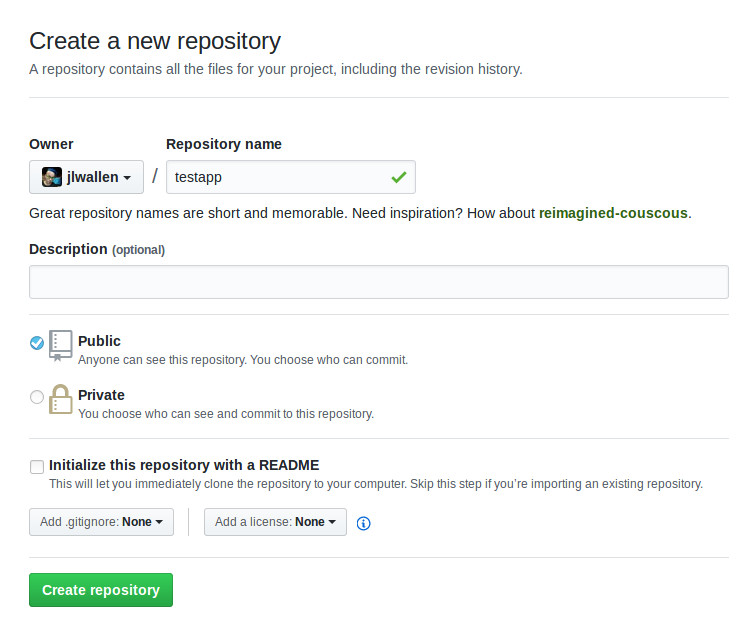
After creating the repository, you will be presented with a URL to use for pushing our local repository. To do this, go back to the terminal window (still within ~/newproject) and issue the commands:
git remote add origin URL

git push -u origin master
Where URL is the url for our new GitHub repository.
You will be prompted for your GitHub username and password. Once you successfully authenticate, the project will be pushed to your GitHub repository and you’re ready to go.
Pulling the project
Say your collaborators make changes to the code on the GitHub project and have merged those changes. You will then need to pull the project files to your local machine, so the files you have on your system match those on the remote account. To do this, issue the command (from within ~/newproject):
git pull origin master
The above command will pull down any new or changed files to your local repository.
The very basics
And that is the very basics of using Git from the command line to work with a project stored on GitHub. There is quite a bit more to learn, so I highly recommend you issue the commands man git, man git-push, and man git-pull to get a more in-depth understanding of what the git command can do.
Happy developing!
Learn more about Linux through the free “Introduction to Linux” course from The Linux Foundation and edX.


