There are so many Linux distributions available, some of which are all-purpose and some that have a more singular focus. Truth be told, you can take most general distributions and turn them into purpose-driven platforms. But, when it comes to things like cloud and IoT, most prefer distributions built with that specific use in mind. That’s where the likes of Clear Linux comes in. This particular flavor of Linux was designed for the cloud, and it lets you install either an incredibly bare OS or one with exactly what you need to start developing for cloud and/or IoT.
What is Clear Linux?
Clear Linux comes from Intel’s Open Source Technology Center, which focuses primarily on the cloud. With that in mind, it should come as no surprise that Clear Linux was designed specifically for the cloud while best leveraging Intel hardware. Because Clear Linux focuses primarily on Intel hardware, it can make best use of power management features and performance optimizations. Clear Linux also features:
-
FUSE file system debugging tool (for complete debug info)
-
Automatic feedback-directed optimizer
-
Function multi-versioning (to assist in developing platforms that can run anywhere)
-
Autoproxy (no need to manually configure proxies)
-
Telemetry (detect and respond to quality issues)
-
Mixer tool (for composing a specific use-case OS)
-
Software Update
-
Stateless (separates the OS configuration, per-system configuration, and VT user-data)
Supported hardware
Clear Linux can run on very minimal hardware (e.g., a single core CPU with 128MB of RAM and 600MB of storage). But it should be known (as you might already suspect), Clear Linux can only run on Intel 64-bit architecture and the hardware must support UEFI (otherwise it won’t boot). The following processor families have been verified to run Clear Linux:
-
2nd Generation, or later, Intel® Core™ processor family.
-
Intel® Xeon® Processor E3
-
Intel® Xeon® Processor E5
-
Intel® Xeon® Processor E7
-
Intel® Atom™ processor C2000 product family for servers – Q3 2013 version or later.
-
Intel® Atom™ processor E3800 series – Q4 2013 version or later.
Beyond Intel architecture, the minimum system requirements are:
-
Memory: 4GB RAM
-
Hard Disk: 20GB HDD
-
Network: Active Internet connection
-
Graphics: Intel HD Graphics (required if running a GUI desktop)
I want to show you how to get Clear Linux up and running. I’ll be demonstrating on a VirtualBox VM. The installation isn’t terribly difficult, but there are certain things you need to know.
Installation
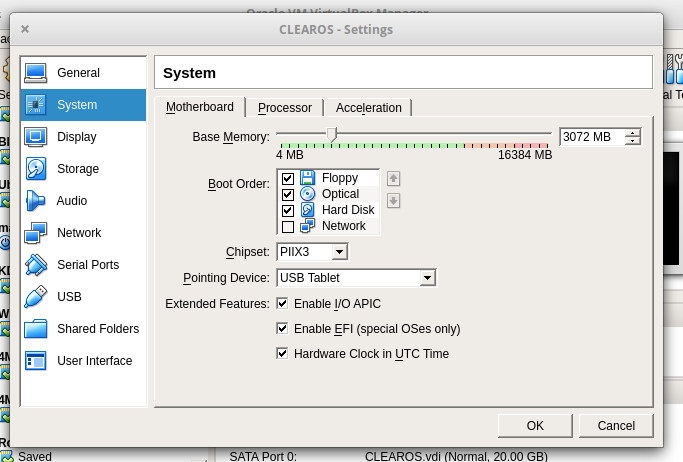
If you are going the route of VirtualBox virtual machine, create the VM as per normal, but you must enable EFI. To do this, open the Settings for the VM and click on the System tab. In this tab (Figure 1), click the checkbox for Enable EFI (special OSes only).

Once you have the VM setup, download the clear-23550-installer.iso.xz file. You will then need to uncompress the file with the command:
unxz clear-23550-installer.iso.xz
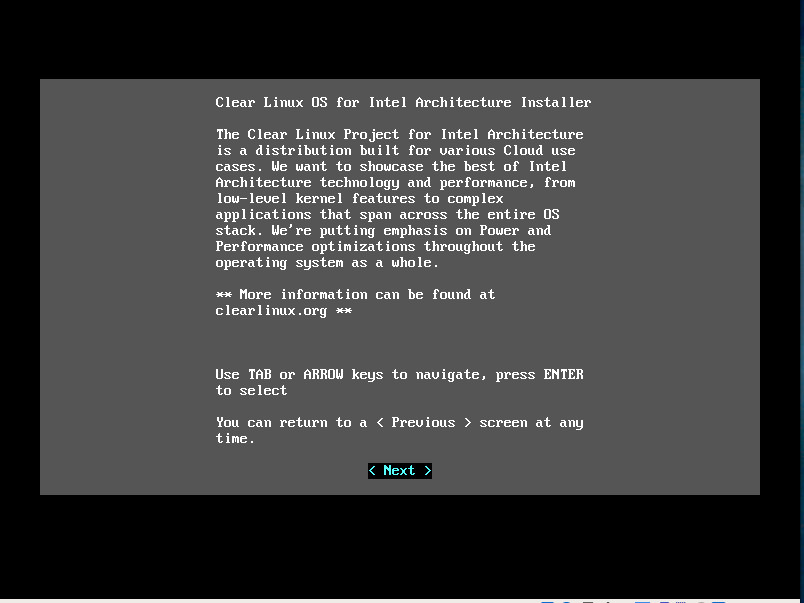
Once the file is uncompressed, you’ll see the clear-23550-installer.iso file. If you are going to use this as a virtual machine, you can attach that to the VM. If you’re installing on bare metal, burn that file to either a CD/DVD or USB flash drive as a bootable media. Boot the media or start the VirtualBox VM to be greeted by the text-based installer (Figure 2).

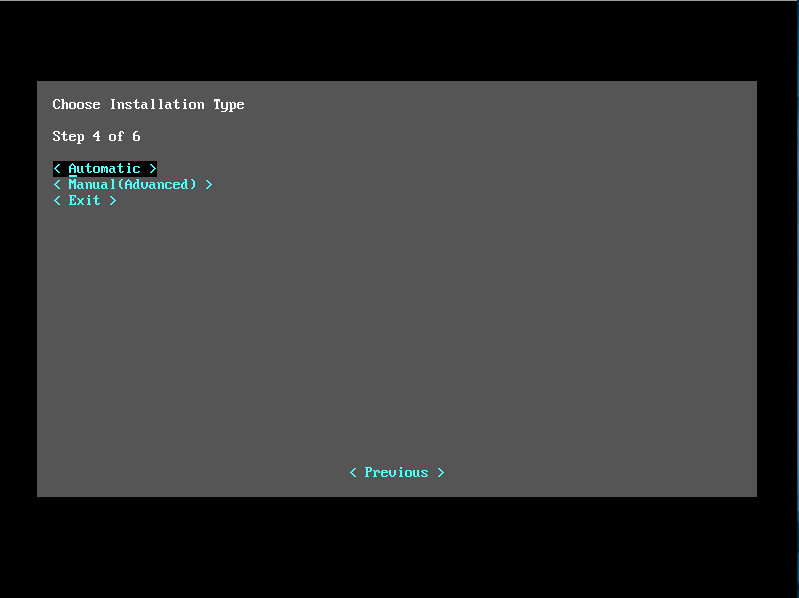
The installer is fairly straightforward. However, you do need to know that if you don’t go the Manual/Advanced route, you’ll wind up with a very bare system. Most of the questions asked during the installation are self explanatory. Just make sure when you reach the Choose Installation Type screen to select Manual (Figure 3).

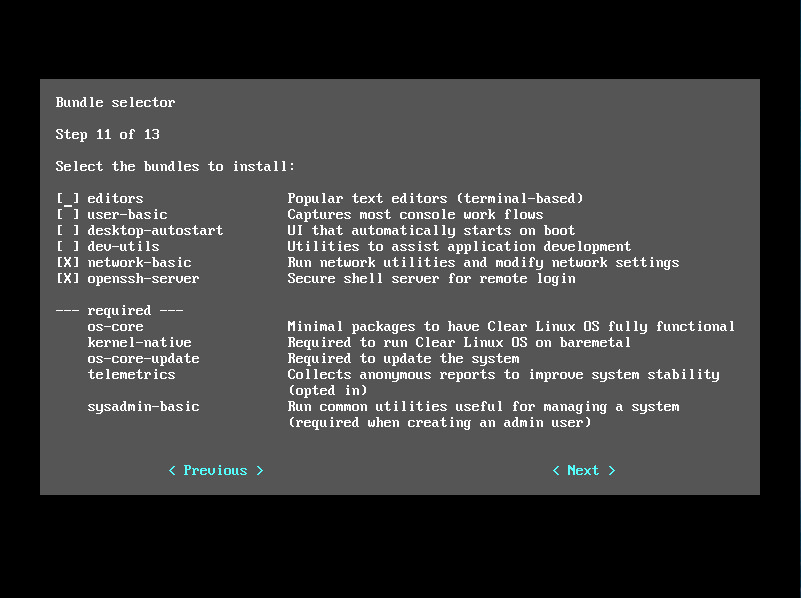
If you go with the default (Automatic), you cannot select any additional packages. Chances are, you will want to go the Manual route (Figure 4).

Another task you are able to take care of in the Manual installation is the ability to create an admin user. If you don’t do that, the only user available is root. Of course, even if you go with the minimal installation, you can add users manually with the useradd command.
Post installation
After the installation completes, reboot and login. If you didn’t install the graphical environment (which probably will be the case, as this is geared toward the cloud), you might want to install more applications. This is done via bundles, using the swupd command. Say you want to run container applications with Docker. For this, you’d add the containers-basic bundle (for a list of all available bundles, see this page). To install the containers-basic bundle, the command is:
sudo swupd bundle-add containers-basic
After that command runs, you can now deploy container applications from Dockerhub. There are quite a large amount of bundles you can add. You can even install the GNOME desktop with the command:
sudo swupd bundle-add desktop-autostart
In fact, using bundles, you can pretty much define exactly how Clear Linux is going to function. Just remember, the base install is pretty empty, so you’ll want to go through the list of bundles and install everything you’ll need to make Clear Linux serve your specific purpose.
It should also be noted that the swupd command also takes care of the updating of bundles. This process is handled automatically. The autoupdate process can be enabled and disabled with the following two commands:
sudo swupd autoupdate --enable

sudo swupd autoupdate --disable
You can also force a manual update with the command:
sudo swupd update
Once you have everything installed and updated, you can start developing for the cloud and/or IoT; Clear Linux will serve you well in that regard.
Make it yours
If you want a cloud/IoT-specific Linux distribution that lets you build a distribution for a very specific need, Clear Linux might be just what you’re looking for. Give it a go for yourself.


