There are so many distributions of Linux. Some of those distributions go a very long way to differentiate themselves. In other cases, the differences are so minimal, you wonder why anyone would have bothered reinventing that particular wheel. It’s that latter concern that had me wondering why antiX and MEPIS communities would come together to create yet another distribution—especially given that the results would be an Xfce edition of antiX, built by the MEPIS community.
Does building antiX with an Xfce desktop warrant its own distribution? After all, antiX claims to be a “fast, lightweight and easy to install systemd-free linux live CD distribution based on Debian Stable.” The antiX desktop of choice is LXDE, which does certainly fit the bill for a lightweight desktop. So why retool antiX into another lightweight distribution, only this time with Xfce? Well, as anyone within the Linux community knows, variance adds flavor and a good lightweight distribution is a worthwhile endeavor (especially in preventing old hardware from making its way to the landfill). Of course, LXDE and Xfce aren’t quite in the same category. LXDE should be considered a true lightweight desktop, whereas Xfce should be considered more a mid-weight desktop. And that, my friends, is key to why MX Linux is an important iteration of antiX. A mid-weight distribution, built on Debian, that includes all the tools you need to get your work done.
But there’s something really keen within MX Linux—something directly borrowed from antiX—and that is the installation tool. When I first set up a VirtualBox VM to install MX Linux, I assumed the installation would be the typical, incredibly easy Linux installation I’d grown accustomed to. Much to my surprise, that antiX installer MX Linux uses could be a real game changer, especially for those on the fence about giving Linux a try.
So even before I began kicking the tires of MX Linux, I was impressed. Let’s take a look at what makes the installation of this distribution so special, and then finally have a go with the desktop.
You can download MX Linux 17.1 from here. The minimum system requirements are:
-
A CD/DVD drive (and BIOS capable of booting from that drive), or a live USB (and BIOS capable of booting from USB)
-
A modern i486 Intel or AMD processor
-
512 MB of RAM memory
-
5 GB free hard drive space
-
A SoundBlaster, AC97 or HDA-compatible sound card
-
For use as a LiveUSB, 4 GB free
Installation
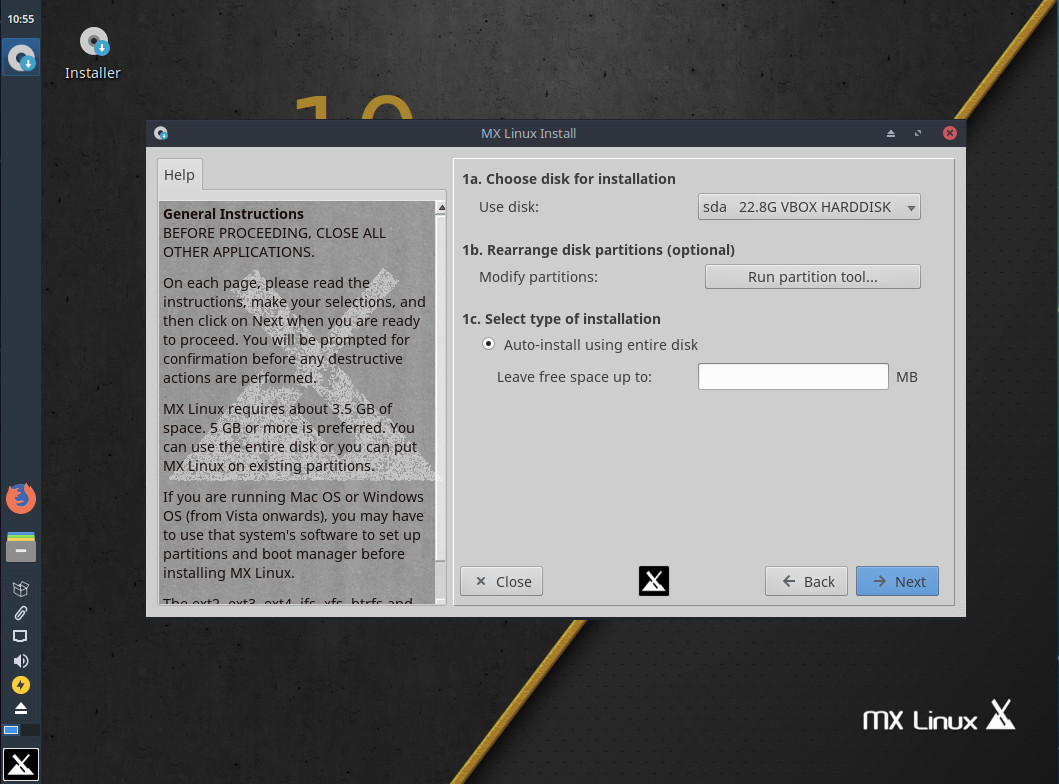
Out of the gate, the MX Linux installer makes installing Linux a breeze. Although it may not be the most modern-looking installation tool, there’s little to second-guess. The heart of the installation begins with choosing the disks and selecting the installation type (Figure 1).
The next important screen (Figure 2) requires you to set a computer name, domain, and (if necessary) a workgroup for MS Networking.
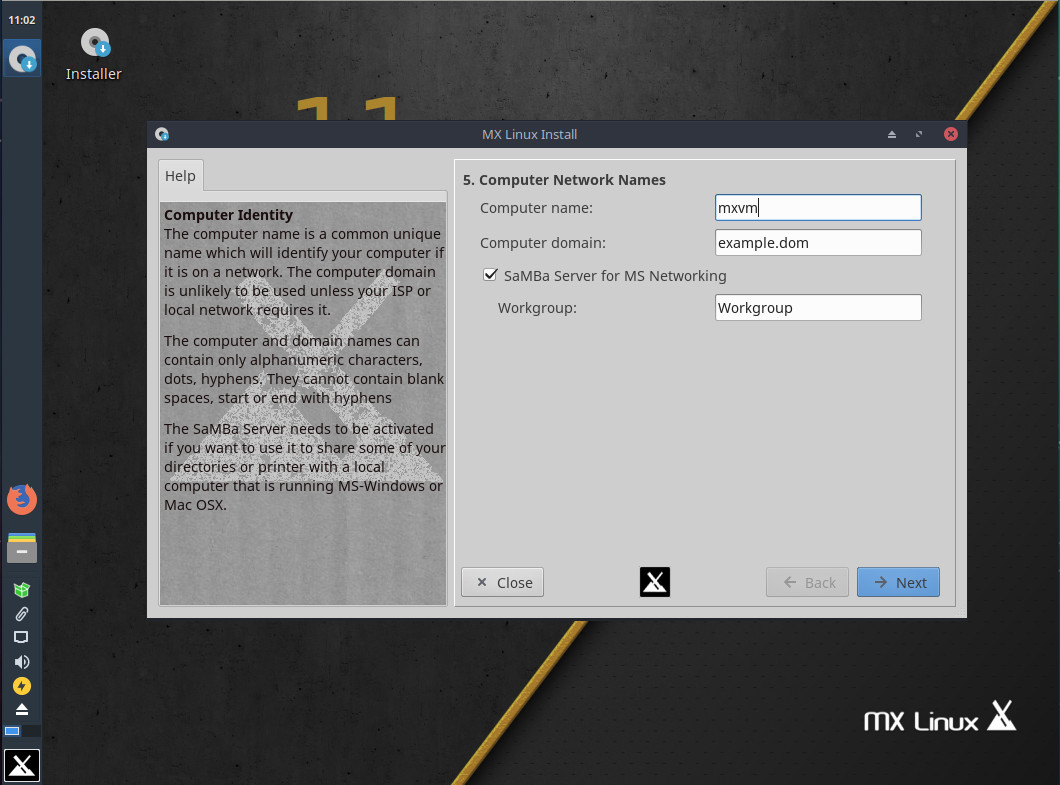
That ability to configure a workgroup is the first bit to really stand out. This is the first distribution I can remember that offers this option during installation. It also should clue you in that MX Linux offers the ability to share directories out of the box. It does, and it does so with aplomb. It’s not perfect, but it works without having to install any extra package (more on this in a bit).
The last important installation screen (that requires user-interaction) is the creation of the user account and root password (Figure 3).
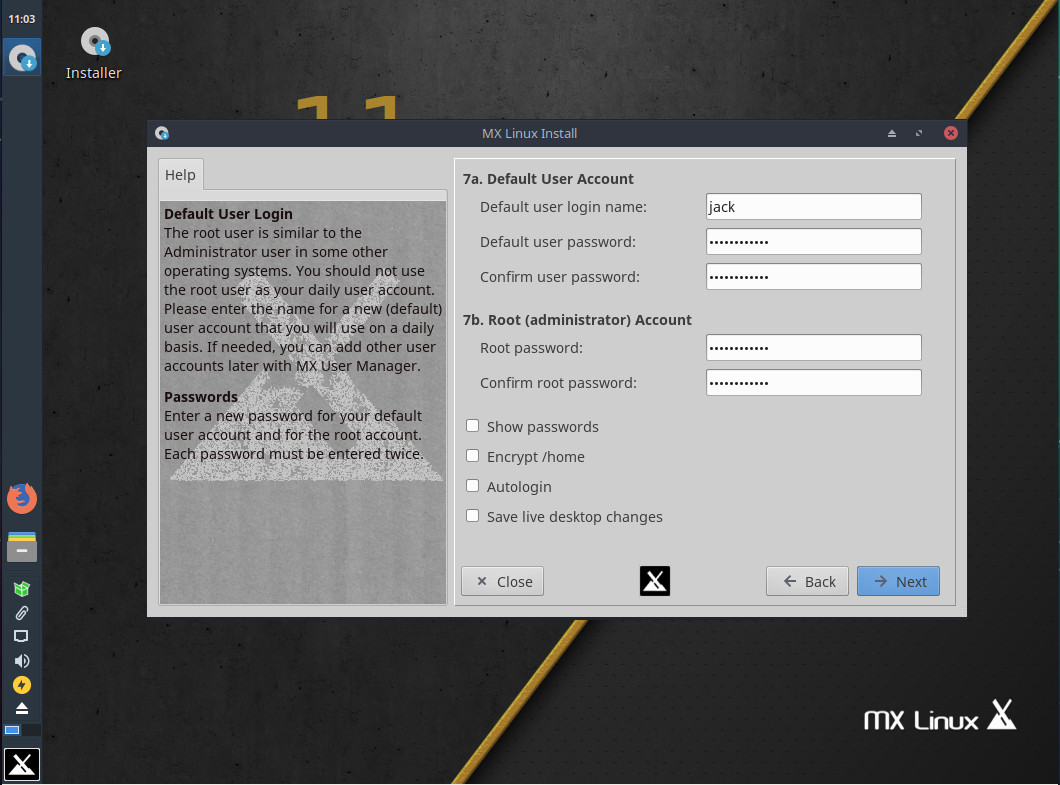
Once you’ve taken care of this final screen, the installation will complete and ask you to reboot. Upon rebooting, you’ll be greeted with the login screen. Login and enjoy the MX Linux experience.
Usage
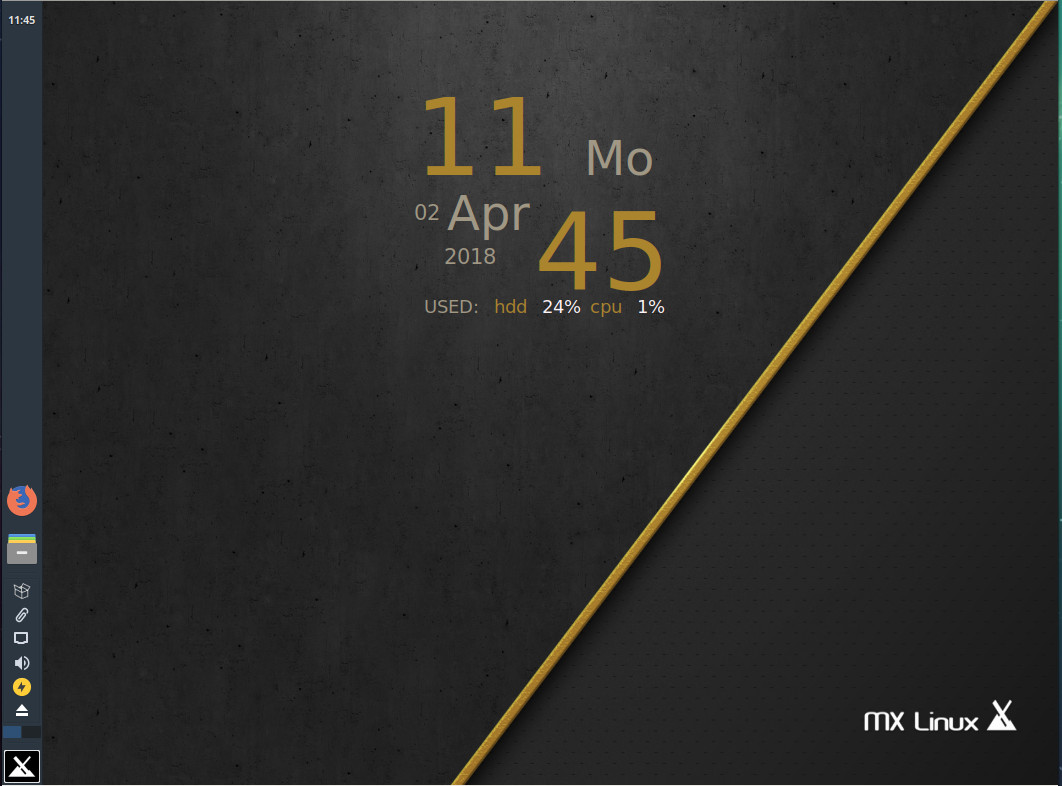
The Xfce desktop is quite an easy interface to get up to speed with. The default places the panel on the left edge of the screen (Figure 4).
If you want to move the panel to a more traditional location, right click a blank spot on the panel and click Panel > Panel Preferences. In the resulting window (Figure 5), click the Mode drop-down to select from between Deskbar, Vertical, or Horizontal.
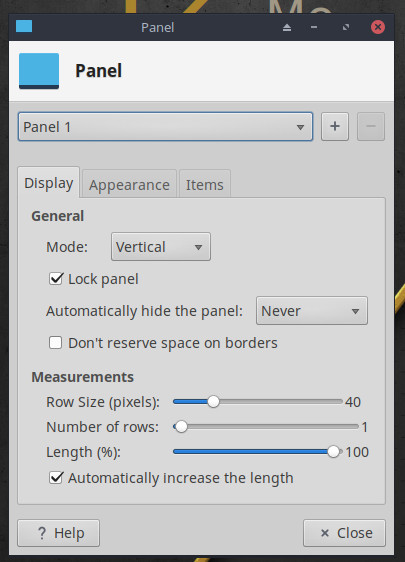
The difference between the Deskbar and Vertical options is that, in the Deskbar mode, the panel is aligned vertically, just like in the vertical mode, but the plugins are laid out horizontally. This means you can create much wider panels (for widescreen layouts). If you opt for a horizontal layout, it will default to the top—you will have to then uncheck the Lock panel check box, click Close, and then (using the drag handle on the left edge of the panel) drag it to the bottom. You can then go back into the Panel Settings window and re-lock the panel.
Beyond that, using the Xfce desktop should be a no-brainer for nearly any experience level … it’s that easy. You’ll find software to cover productivity (LibreOffice, Orage Calendar, PDF-Shuffler), graphics (GIMP), communication (Firefox, Thunderbird, HexChat), multimedia (Clementine, guvcview, SMTube, VLC media player), and a number of tools specific to MX Linux (called MX Tools, that range from a live-USB drive creator, a network assistant, package installer, repo manager, live ISO snapshot creator, and more).
Samba
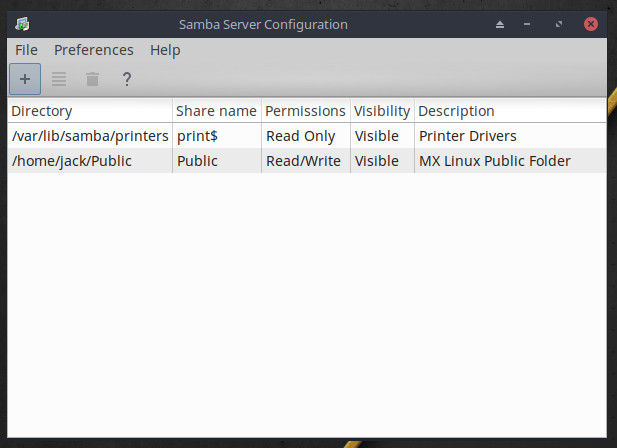
Let’s talk about sharing folders to your network. As I mentioned, you won’t have to install any extra packages to get this to function. You simply open up the file manager, right-click anywhere, and select Share a folder on your network. You will be prompted for the administrative password (set during installation). Upon successful authentication, the Samba Server Configuration Tool will open (Figure 6).
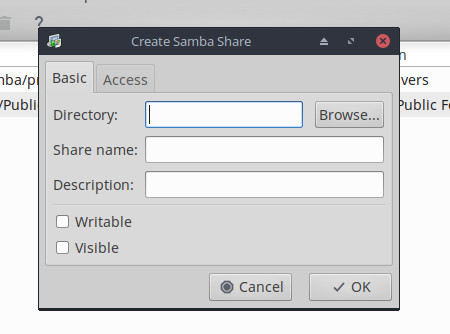
Click the + button and configure your share. You will be asked to locate the directory, give the share a name/description, and then decide if the share is writeable and visible (Figure 7).
When you click the Access tab, you have the choice between giving everyone access to the share or just specific users. Here’s where the problem arises. At this point, no users will be available for sharing. Why? They haven’t been added. In order to add them, there are two possibilities: From the command line or using the tool we already have open. Let’s take the obvious route. From the main window of the Samba Server Configuration Tool, click Preferences > Samba Users. In the resulting window, click Add user.
A new window will appear (Figure 8), where you need to select the user from the drop-down, enter a Windows username, and type/retype a password for the user.
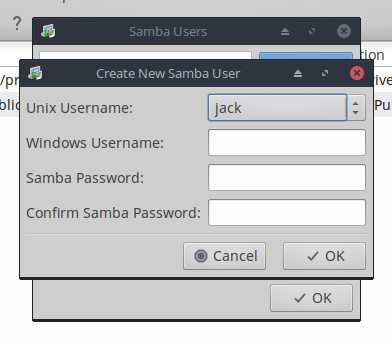
Once you’ve clicked OK, the user will be added and the share will be accessible, to that user, across your network. Creating Samba shares really can be that easy.
The conclusion
MX Linux makes transitioning from just about any desktop operating system simple. Although some might find the desktop interface to be a bit less-than-modern, the distribution’s primary focus isn’t on beauty, but simplicity. To that end, MX Linux succeeds in stellar fashion. This flavor of Linux can make anyone feel right at home on Linux. Spin up this mid-weight distribution and see if it can’t serve as your daily driver.
Learn more about Linux through the free “Introduction to Linux” course from The Linux Foundation and edX.


