Let’s not mince words here. Arch Linux is a challenge to install. If it weren’t, we wouldn’t have so many distributions, such as Anarchy, which we covered previously, claiming to make Arch accessible for any user. Some of those distributions succeed and some fall flat. But few do as remarkable (albeit someone confusing) of a job as does Namib Linux. Not only does Namib Linux make installing and using Arch Linux as simple as can be, it also offers everything desktop Linux should have:
-
Pre-installed codecs to play multimedia files.
-
Automatic installation of hardware drivers.
-
Access to the latest versions of software.
-
Support for the easy installation and use of multiple kernels.
All of that, along with the usual Linux goodness that comes with standard desktop distribution (graphical desktop interface, pre-installed applications, etc.), helps make Namib Linux pretty impressive.
A little about Namib Linux
Namib Linux is a rolling release distribution created and maintained by Meerkat Software, which is based in New Zealand. One of the key aspects of Namib Linux is the idea that privacy, security, and control is of the utmost value. To that end, Namib Linux allows you to:
-
Update only when you want
-
Protect your data
-
Change nearly every aspect of the desktop
I’ve installed Namib Linux as a VirtualBox virtual machine and I can, without question, say the distribution lives up to its claims. Let’s get it installed and see what makes this user-friendly approach to Arch Linux special.
Installation
I’d love to spend a good amount of time discussing the installation of Namib Linux, but Meerkat Software has done such a great job of making the installation easy, there’s little use dwelling on the subject. Download the ISO image (there are four versions to choose from: Mate, GNOME, KDE, or Xfce), burn it to a disk, or USB drive (or just create a VirtualBox VM from the ISO) and boot up your machine (or virtual machine). I’ve tried both the Mate and GNOME versions of Namib Linux and can say they are both stellar options.
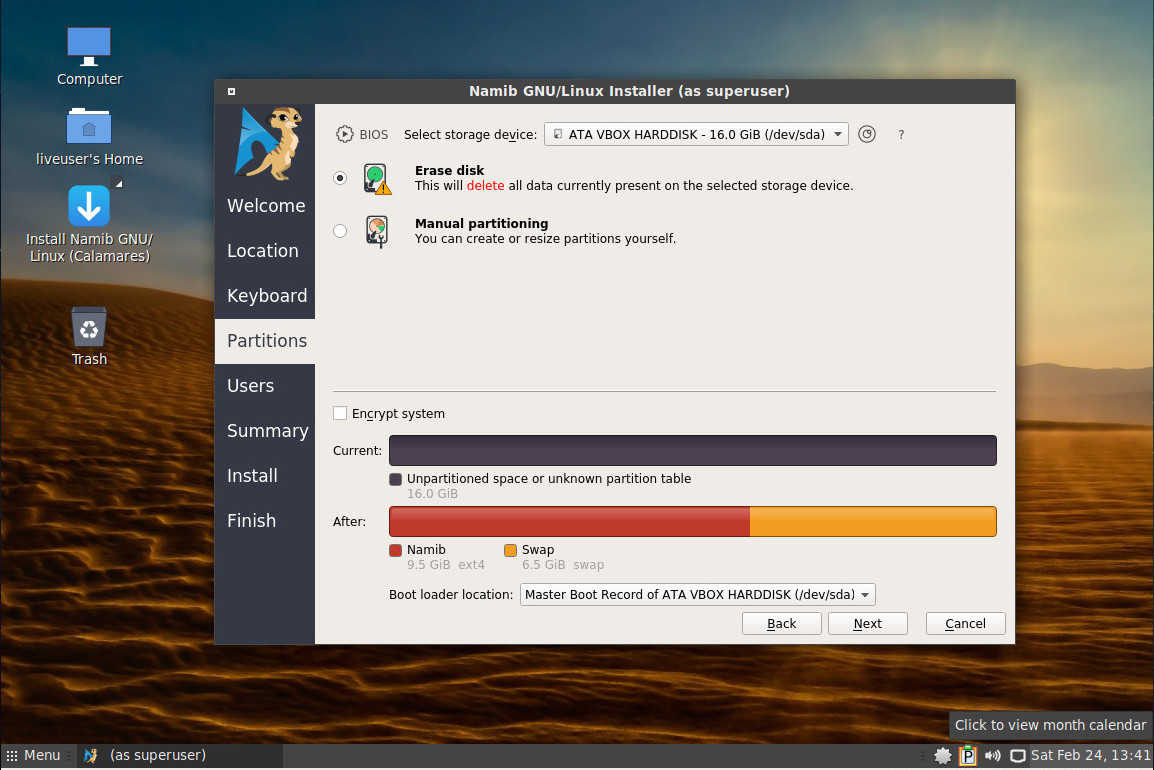
Namib Linux uses the Calamares Installer (Figure 1), which happens to be one the most user-friendly installers on the planet.

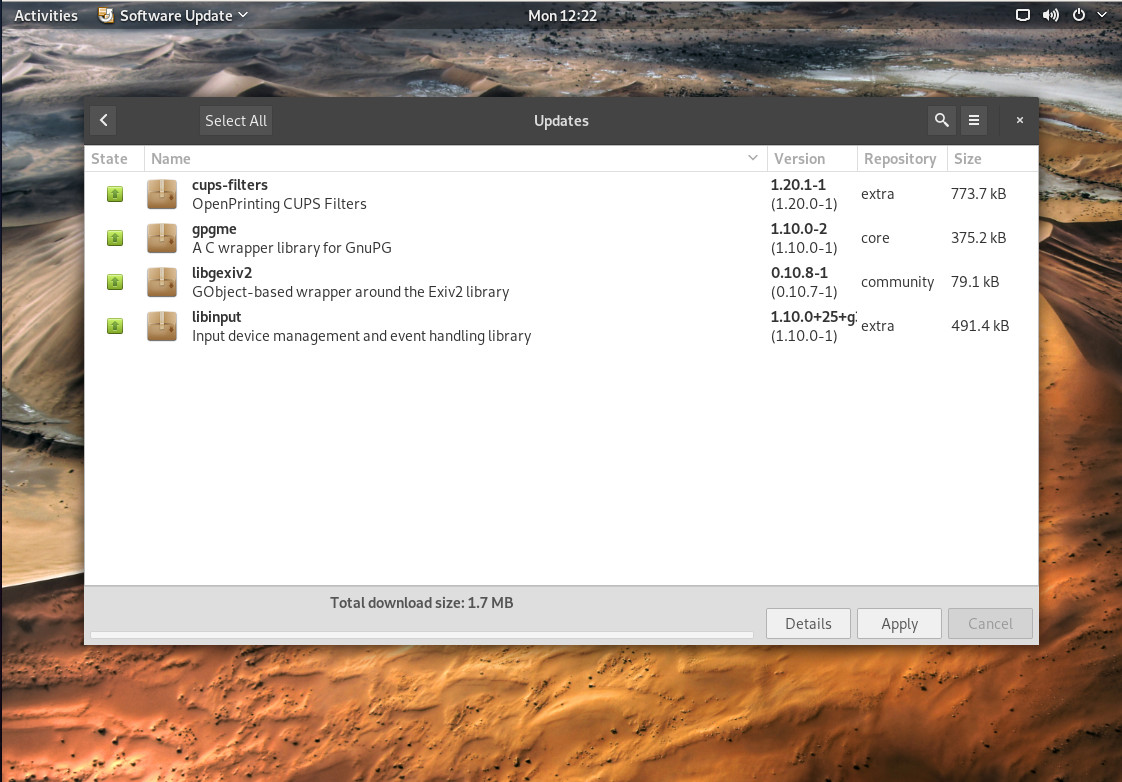
Once installed, you’ll find your Namib Linux desktop ready to serve. Reboot and log into your user account. The first thing you might check is to see if there are any updates. Open the software update tool for your desktop of choice (Figure 2) and run any necessary updates.

Because Namib Linux is a rolling release, you won’t have to install again, once a new release is out. Just keep it up to date and you’re good to go.
Software variations
I did notice that, between the Mate and GNOME editions of Namib, there are different main packages installed. For example, in the GNOME edition, LibreOffice is installed, whereas with the Mate edition, it is not. Oddly, the installed version of LibreOffice is out of date (at 5.4.5.1). Considering this is a rolling release, I am surprised that the Fresh version (6) of LibreOffice isn’t installed. If, however, you install LibreOffice from the default package manager, you will find the Fresh version (6.0.1.1 as of this writing) available. If you do this on the GNOME version, you’ll wind up with two different releases of LibreOffice.
Fortunately, each iteration of Namib Linux does include a graphical software installer (e.g., GNOME Software or Pamac). Thus, installing or removing software is as easy as opening the software installer, searching for the package to be installed (or removed), selecting it for installation (or removal), and providing your user password. This means you can open up the Add/Remove Software tool, and easily uninstall the LibreOffice 5 release. Oddly enough, GNOME Software wasn’t able to see the LibreOffice Still (5) version. Because of this, the only way to remove it (using a graphical tool) was by way of Pamac.
Conversely, I did notice that installing LibreOffice Fresh via GNOME Software resulted in the Add/Remove Software tool not being aware of this new installation. That’s right, both GNOME Software and Pamac will be available in the GNOME edition of Namib Linux, and they seem to have difficulting seeing what one another is doing. Even so, LibreOffice Fresh can be installed and launched from the GNOME Dash. NOTE: This issue didn’t appear in the Mate version of Namib Linux, as LibreOffice isn’t installed by default.
Regardless of your desktop of choice, Namib Linux does include a few extra bits and pieces (as compared to the likes of, say, Ubuntu Linux. You’ll find:
-
Avahi Server Browser
-
HP Device Manager
-
Parcellite (clipboard manager)
-
PulseAudio Volume Controller
-
V4L2 Test Bench
-
Polari IRC Chat
-
Builder
-
Nambi Notifications Settings
-
Namib Settings
It is that final entry that might be of interest to users. Within the Namib Settings tool, you can configure:
-
Locale Settings
-
Language Packages
-
User Accounts
-
Time and Date
-
Hardware
-
Keyboard
-
Kernel
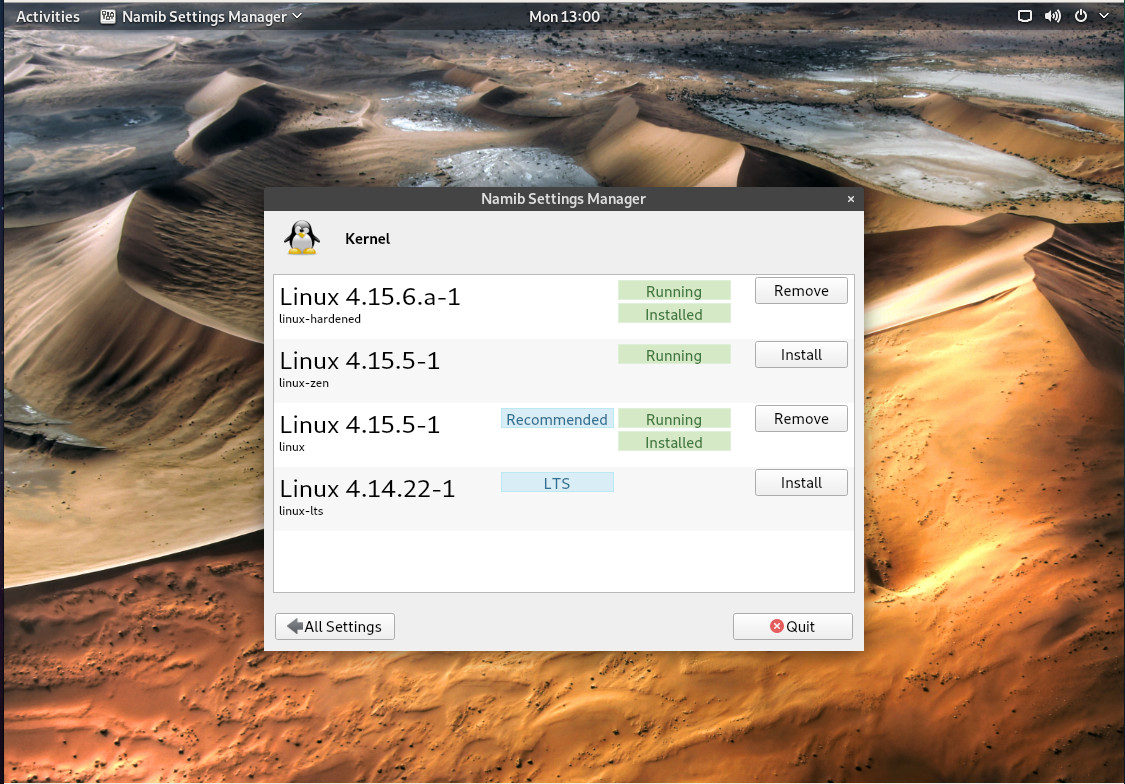
That’s right, Namib Linux allows the user to easily install and remove kernels. If you open up the desktop menu and type namib, you’ll see the Namib Settings Manager. Open that and then double-click on the Kernel entry. In the resulting window (Figure 3), you will see a listing of available kernels.

As you can see in the figure, I’ve already installed kernel 4.15.6a-1, so it is now available, alongside 4.15.5-1. Kernel 4.14.22-1 is also available for installation. Should I opt for one of the other kernels, I only need to click the Install button associated with the kernel I want to run. After entering the user password, the kernel will be downloaded and installed. When prompted, click Close and reboot your machine for the changes to take effect.
I did find one issue with this tool. After installing the 4.15.6-1-hardened kernel (using the Namib tool), I rebooted as described, only to find the 4.15.5-1 kernel running. It wasn’t until I issued the command sudo grub-mkconfig -o /boot/grub/grub.cfg, that the newer kernel booted. This leads me to believe the Namib Kernel Settings window is incomplete or somewhat misleading. According to the documentation, this is a one-click kernel switcher. However, if (after installing a new kernel) it then requires the user to issue the grub-mkconfig command, it is not truly a one-click solution.
Even with that one caveat, it does make for easy kernel switching.
Definitely worth a try
Even with these caveats, Namib Linux makes Arch Linux incredibly accessible for new users. If you’ve been looking for an excuse to get familiar with Arch Linux, you should definitely give Namib Linux a go. Once you’re familiar with the environment, you may want to give Arch Linux a try.
Learn more about Linux through the free “Introduction to Linux” course from The Linux Foundation and edX.


