As Django follows a design pattern similar to MVC, let’s first understand what MVC is.
MVC Design Pattern
There are various MVC (Model, View, Controller) frameworks available like CakePHP, Zend Framework for PHP developers, Struts for Java developers, Catalyst for Perl developers, and Rails for Ruby developers.
Model
Model is generally used to interact with the databases. Suppose you are working on some social networking site and you want to get user’s friends list. All the queries regarding this are written in Models. The resultant output is passed on to Controller.
Controller
All the business logic goes here. Consider the same scenario above, where the user wants to get his own friends list. At this time Controller will get some inputs from the user. Inputs may be the number of friends he wants to see at a time or may be the number of users from India. Based on the user inputs, the Controller with interact with the Model to get the friends list. Then the list is passed to View.
View
View is used for creating the User Interface. In our case, the User Interface will be based on the friends list recieved from Controller. View will take care of how the list is displayed and what details are to be displayed.
The MVC pattern allows us the write the code that is easier to maintain; Programmer writes Model and Controller and, at the same time, Designer can create View. And also a few changes somewhere won’t affect the entire system. We can say that MVC applications are loosely coupled.
MTV Design Pattern
Django follows a slightly modified version of the MVC design pattern called the MTV design pattern. MTV stands for Model-Template-View. Here’s how Django‚Äôs MTV pattern is set up.
Model
A Model in Django is a Python class that represents a table from a database. You don’t need to write complex SQL queries to get records from the database. You can do it by writing Python code itself.
View
In Django, Views contain all business-logic code.
Template
These are the HTML pages that create the User Interface. Django comes with a very powerful templating system.
Get Set, Code
Now it’s time to create our application. The application will be a simple address book. We will make use of Django‚Äôs Admin to add records and will create a View to display the contacts in address book.
To begin creating our new Django project, run the following command:
$ django-admin.py startproject djangoapp
A new directory called list will be created, which contains following files:  
- __init__.py: So that Python treats this directory as a package.
- manage.py: Command-line utility to interact with our project.
- settings.py: Configuration file for our project.
- urls.py: URL mappings of our project.
Django comes with lightweight Web server. DON’T USE IT FOR PRODUCTION. Next, enter
$ cd djangoapp
And boot the webserver:
$ django-admin.py manage.py runserver
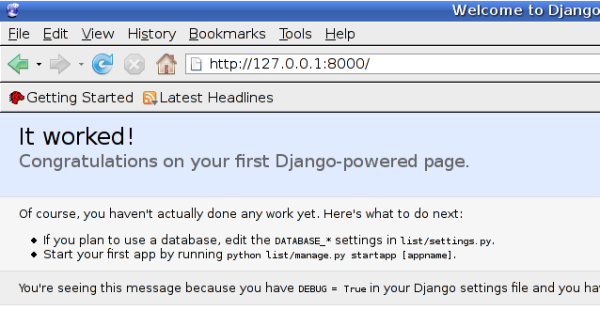
 This will start Web server on port 8000 (default). Visit http://localhost:8000/ from your browser. You should see an “It worked!” message like Figure 1.
Now let’s configure database connection for our application. Open the settings.py file. You will see the following lines:
 DATABASE_ENGINE = ''
 DATABASE_NAME = ''
 DATABASE_USER = ''
 DATABASE_PASSWORD = ''
For our application, we are using MySQL and the database name is “addressbook”. So we have to edit above lines as follows:
 DATABASE_ENGINE = 'mysql'
 DATABASE_NAME = 'addressbook'
 DATABASE_USER = 'root'
 DATABASE_PASSWORD = 'password'
Django’s models requires a new application to be created. So, type the following command to create new application:
$ python manage.py startapp addressbook
This will create new directory called friends with the following contents:
__init.py__
models.py
views.py
Change directory to friends:
$ cd addressbook
Edit models.py and write following contents in it:
 from django.db import models
 class Contacts(models.Model):
     name = models.CharField(max_length=30){ margin: 0.79in }
     phone = models.CharField(max_length=30)
     email = models.EmailField()
The class Contacts will be a table in database and the variables ‚Äòname‚Äô, ‚Äòphone‚Äô, and ‚Äòemail‚Äô will be the columns of Contacts table. Yeah, there’s no need to write SQL queries–Django can do it for you. We will see that later.
Now we need to tell Django to use this ‘Contacts’ model(djangoapp/addressbook/models.py). Edit the settings.py file, and go to the INSTALLED_APPS section and add ‘addressbook’. It should look like this:
 INSTALLED_APPS = (
     'django.contrib.auth',
     'django.contrib.contenttypes',
     'django.contrib.sessions',
     'django.contrib.sites',
     'addressbook',
 )
Validating Models
$ python manage.py validate
The above command will validate models in your application. It will check for syntax and logical errors. If everything is okay, then it should give 0 errors found message. Now run the following command to generate queries of the models:
$ python manage.py sqlall addressbook
In the above command, addressbook is the name of our app for which queries are to be generated. This won’t create a table in the database, it will just output the queries that will be executed at the time of creating tables. The table name will start with ‚Äòaddressbook_‚Äô and ‚Äòid‚Äô column(Primary Key) is added by default. And now syncdb to create tables:
$ python manage.py syncdb
This will execute the statements that were generated by sqlall command. Now, as we have our database ready, we will make use of Django’s Admin. To use Admin, we need to add ‘django.contrib.admin’ to INSTALLED_APPS:
 INSTALLED_APPS = (
     'django.contrib.auth',
     'django.contrib.contenttypes',
     'django.contrib.sessions',
     'django.contrib.sites',
     'addressbook',
     'django.contrib.admin',
 )
And again sync the database:
$ python manage.py syncdb
As we have added admin in INSTALLED_APPS, syncdb will now ask you to create superuser for the application. We need superuser to access admin. Now we have to add our model to admin. To do that create a file called admin.py in our application (i.e., under djangoapp/addressbook/):
 from django.contrib import admin
 from djangoapp.addressbook.models import Contacts

 admin.site.register(Contacts)
And, finally, edit urls.py. Add (r’^admin/(.*)’, admin.site.root) in urlpatterns so that we can access admin at http://localhost:8000/admin. Our urls.py file looks like this:
 from django.conf.urls.defaults import *

 # Uncomment the next two lines to enable the admin:
 from django.contrib import admin
 admin.autodiscover()

 urlpatterns = patterns('',
     # Uncomment the next line to enable the admin:
     (r'^admin/(.*)', admin.site.root),
 )
Now run the server:
$ python manage.py runserver
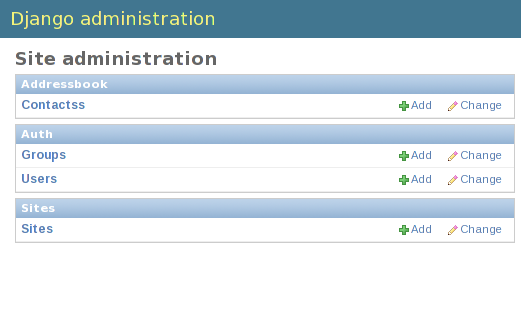
 You can access admin at http://localhost:8000/admin, as shown in Figure 2.
Click on Add link under Addressbook and start adding to the list. Django Admin is very useful and it also provide every kinds of validations.
Now we will write a view to display the added contacts. Open the file views.py under addressbook and write the following:  
 from django.shortcuts import render_to_response
 from models import Contacts

 def contacts(request):
     contacts_list = Contacts.objects.all()
     return render_to_response('contacts_list.html', {'contacts_list': contacts_list})
In the above code, we created a function called Contacts. We retrieve all the records from the Contacts model using Contacts.objects.all() . We used render_to_response to send variables to templates. The first argument is the template name (contacts_list.html in our case) and the second argument is a dictionary. The key in the dictionary is the name of the variable that can be accessed in template contacts_list.html. The value in the dictionary is the variable that we will access in template. We have to create a directory called templates in addressbook and we will place contacts_list.html. In contacts_list.html we just loop through the contacts_list dictionary which we had passed in contacts function in views.py:
 <html>
 <head><title>Address Book</title><head>
 <h1>Address Book</h1>
 <body>
 <table>
 <tr>

 <td>Name</td>
 <td>Phone</td>
 <td>Email</td>
 </tr>
 {% for contact in contacts_list %}
 <tr>

 <td>
 {{ contact.name }}</td>
 <td>
 {{ contact.phone }}</td>
 <td>
 {{ contact.email }}</td>
 </tr>

 {% endfor %}</table>
 </body>
 </html>
To see the output we have to map url to addressbook view. Change the urls.py so that it looks as follows:
 from django.conf.urls.defaults import *
 from contacts.views import contacts
 # Uncomment the next two lines to enable the admin:
 from django.contrib import admin
 admin.autodiscover()

 urlpatterns = patterns('',
     (r'^show/', contacts),
     # Uncomment the next line to enable the admin:
     (r'^admin/(.*)', admin.site.root),
 )
You can see the list of contacts at http://localhost:8000/show/.
In this post, we covered some basics about Django like admin, creating a view and using templates. I will be posting more about Django soon.
References: http://www.djangobook.com


