The Darktable RAW photo editor, light table and workflow manager takes a different approach to photo editing and management. The interface takes some getting used to; is it worth the learning curve?
The Darktable RAW photo editor and workflow manager for Linux (and experimental support for Mac OS X and Windows) is for non-destructive editing of RAW photo images. It includes common features such as cropping and exposure fixes, manipulation of color and tone channels, and advanced features like a Fujichrome Velvia film plugin (for smoother, more realistic saturation), HDR, and tethered shooting. I put the March 15 release of version 1.0 through the torture chamber, and even though the interface and workflow take some getting used to, it’s a powerful editor for serious work.
I’m a fan of PPAs, the Ubuntu Personal Package Archives. These have have made boatloads of updated software available to Ubuntu and Ubuntu spinoffs, like my Linux Mint KDE4 system. No more waiting for stuff to trickle into the official repos, but nearly-instant gratification via your favorite package manager. The Ubuntu version of Darktable is 0.9, while the PPA version is 1.0. There are a lot of changes and improvements to 1.0, so visit the Darktable installation page to learn how to get the current release for your system.
Wee Font Size and Poxy Dark
Darktable is a GTK+ application, so there are possible glitches when it’s run in any environment other than GNOME, like configuring fonts on my Mint system. I am not a fan of dark backgrounds, and emphatically not a fan of tiny light fonts on dark backgrounds. I just want to be able to read stuff, not have a Goth experience. The default font size is wee tiny minuscule 8 point, and there is no way to change it in the Preferences dialog. If I could even read the Preferences dialog.
The GTK+ Appearances dialog in the KDE settings doesn’t work either. You have to edit darktable.gtkrc, which on my Linux Mint is system is in /usr/share/darktable/. There are three different lines in this file for setting font preferences, and once you hunt those down you can make the fonts whatever you want. You can also customize the colors and other appearance attributes in this file. It does not appear to support user configuration files, but only the global file.
Tethered Shooting
Once I sorted that out and could actually see what I was doing, I was ready to be pleased and delighted. Editing photos is always fun, but I went straight to the most exciting feature for me, and that is tethered shooting. Tethered shooting is the bee’s knees because you control your camera from a computer: you can download photos directly to your computer, review your images on a large screen, trigger the shutter from your computer, and set up automatic time-lapse shooting. Obviously this is not so practical for hand-held shots, but it’s wonderful for tripod work.
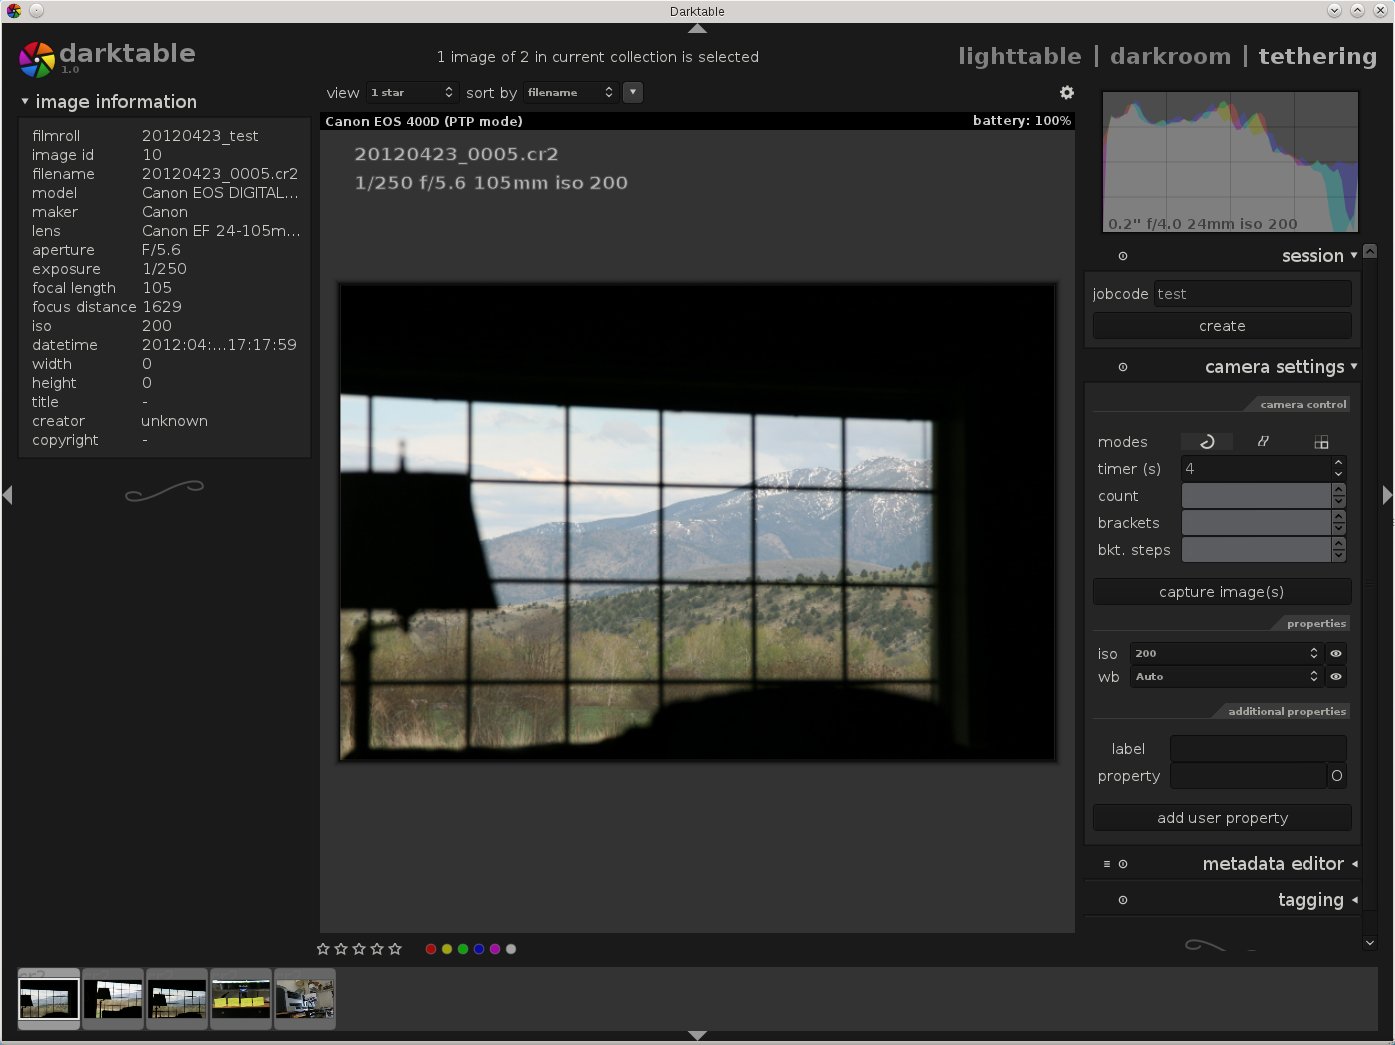
Tethered shooting with Darktable is as easy as eating chocolate cake. Connect your digital camera to your PC with a USB cable. Don’t let it be auto-mounted because Darktable needs an exclusive lock. Open Darktable, make sure your camera is powered on, and click Scan for devices. If your camera is supported Darktable will display its name and two buttons: import from camera and tethered shoot. Click the tethered shoot button to open the Tethering window, and it’s all ready to go. Point your camera at something and click the capture image/s button, and it will take a picture. Figure 1 shows a wobbly hand-held example taken from my desk.
The jobcode field lets you name your shooting sessions; enter a name in top box and then click the create button directly underneath. Use the Camera settings section to set up time delays, automatic timed shots, and automatic exposure-bracketed shots.
A nice touch is the swirly graphic that shows when you’re at the end of the configuration panels. The backend for tethered shooting is gphoto2, and you can find out if your camera is supported by consulting the table of supported cameras on gPhoto’s Sourceforge page. If you’re trying tethering on more than one photo app, for example Darktable and Rawstudio, power-cycle your camera when you change apps so it will be detected correctly.
Light Table
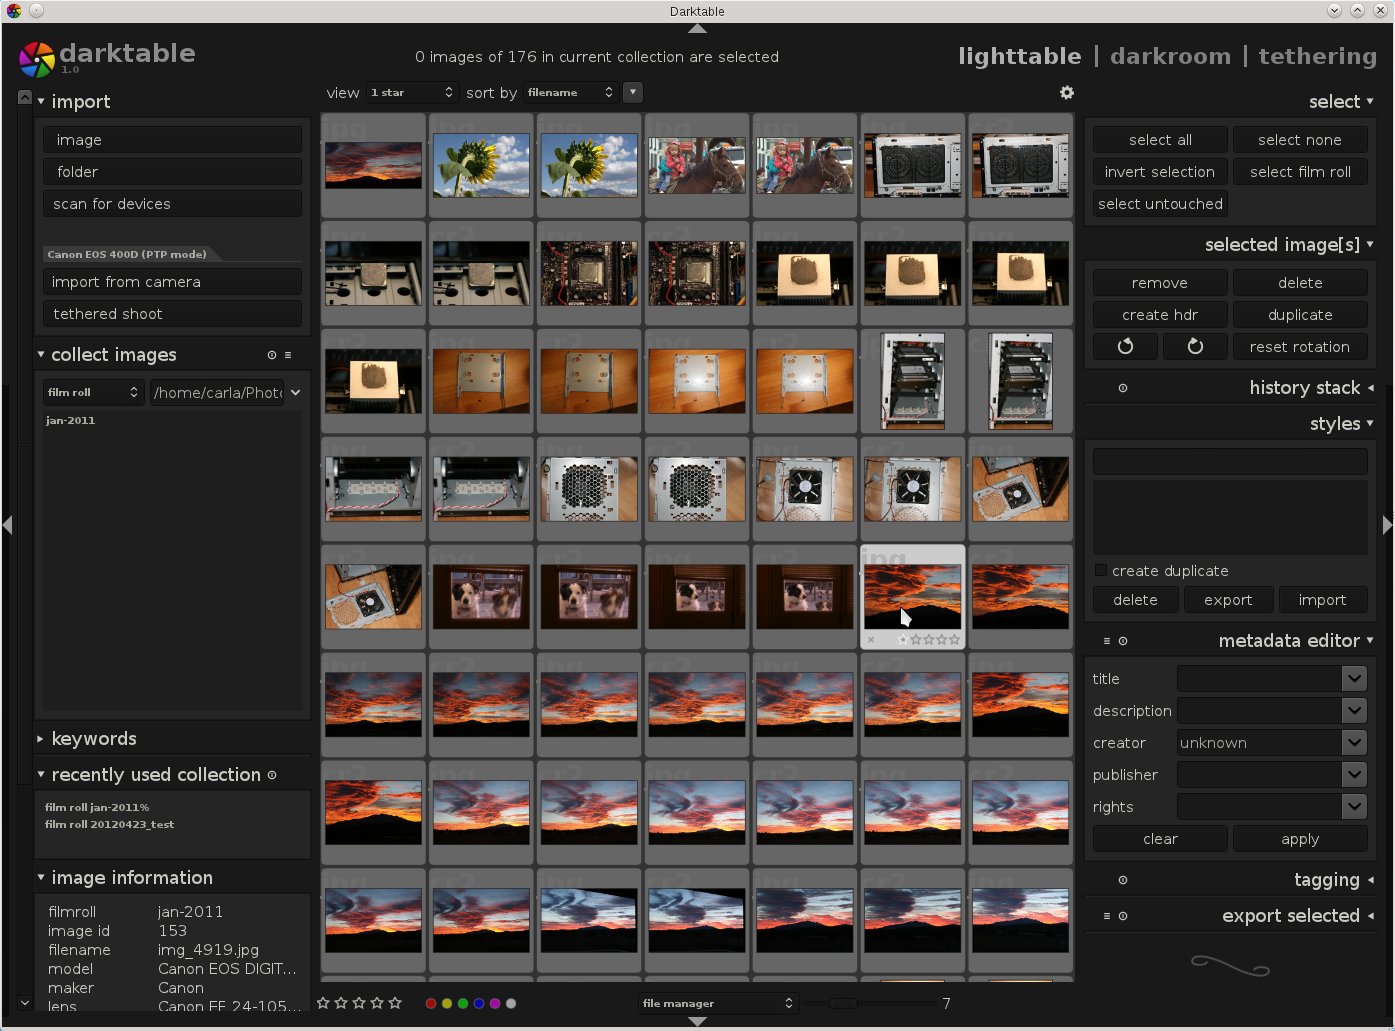
Darktable has three views: Light table, Darkroom, and Tethering. You can click between these in the top-right of Darktable, or press l, d, t. If you’re experienced with good old-fashioned film photography you’ll feel at home in Darktable, because it uses film terminology and concepts. Instead of a thumbnail view, you have filmstrips on a light table. When you edit an image it goes into the Darkroom. When you open a directory of photos it’s a film roll. Figure 2 shows a full light table.
You have many sorting options in the light table view: stars, colored labels, time, id, and filename. Page up and down with the PgUp/PgDown keys, or scroll with the mouse wheel or arrow keys. Filter by camera, history, description, creator, lens, aperture, changed, unchanged, and a host of other criteria. There is a little zoom slider at the bottom, a metadata editor, and a built-in HDR (high dynamic range) blender. You can copy and delete images, and the remove button removes images from Darktable’s view without deleting them. 
Darkroom
When you’re ready to edit an image, select it on the Lighttable and press the d key. The filmstrip moves to the bottom so you can quickly switch to a different image. Darktable comes with the usual editing functions plus a batch of 47 special-effects plugins, and there are a few experimental plugins in a separate package. The plugins icons are not labeled, and the tiny icons don’t really show what the plugins are for. You have to hover the cursor over each plugin to see what it is, which is a rather slow way to search them. There is a quick and clever way to manage the plugins, and that is with plugin groups. Look at the histogram at the top right – underneath it is a row of buttons, and each button displays a different set of plugins, such as favorites, color group, tone group, and several more.
You can make any plugin a favorite by clicking on it until it says “show [plugin] as favorite.” Each plugin cycles through three states: show plugin, plugin as favorite, hide plugin. Some of my favorite plugins are the over/under-exposure indicator, spot remover, hot pixel finder and fixer, fill light, and a nice graduated neutral density filter simulator.
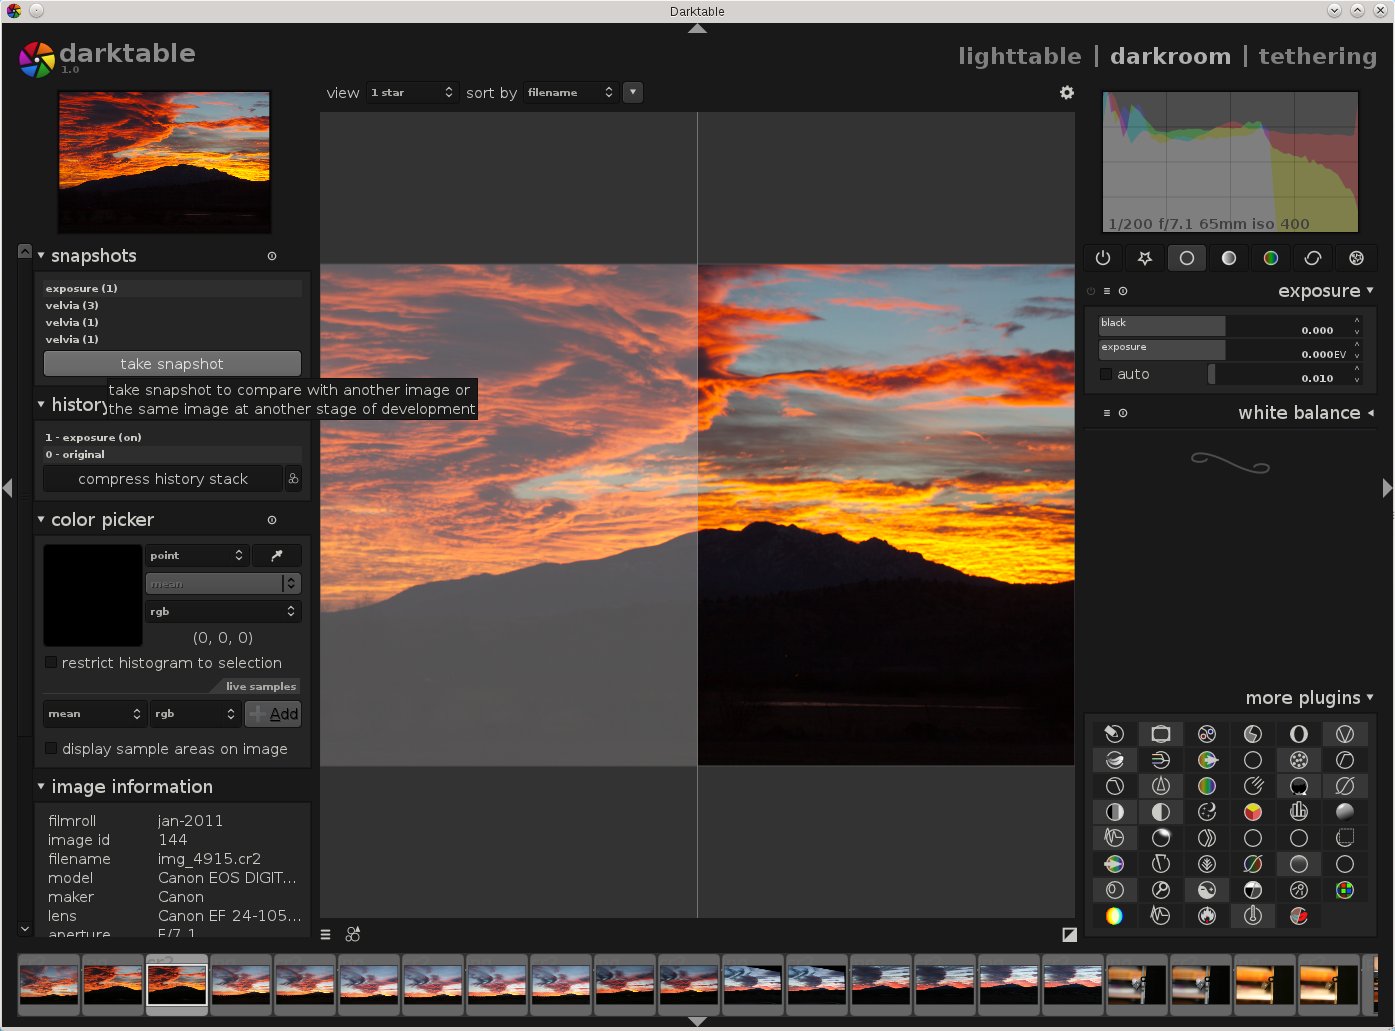
One of my favorite features is snapshots (figure 3). You can take snapshots of your image at different stages in your editing, and then compare any two of them side-by-side.
The History panel is a fantastic tool for saving all the steps used to edit an image. Compress history stack automatically deletes redundant steps, and then you can click the little create a style from the current history stack button to make a re-usable Style. Styles are managed in a panel on the right side in light table view.
Saving images is a bit awkward because you have to switch to the light table and use the export module. But you’ll never accidentally overwrite your original because Darktable won’t let you; nothing is changed until you export your image.
Batch Operations
Darktable’s batch operations are not immediately apparent, but they exist and have superpowers. Save your history stacks as Styles in Darkroom view, then select multiple images and apply a style to them at export in the Lighttable.
There are many more things Darktable can do, and if you spend some quality time with it, it just might become your preferred RAW editor.


